
The Thoracic Spine
If you have pain in the neck, upper back or shoulders, it’s very possible that the source of the pain might be a restriction in your thoracic spine.
The thoracic spine, or mid back, is the middle aspect of our spinal column between the neck and lower back. This is an exceptionally stable area of the spine (think back half of the torso) and is where the ribs attach to our skeletal system. It is composed of 12 vertebrae and is designed to rotate our torso and assist our shoulder blades with movement such that our arms can move freely (or move us freely).
What causes a sad thoracic spine?
In today’s world of electronic devices and desk jobs, many of our postural habits revolve around a seated position. When gravity works on us all day in this forward posture, the muscles across the thoracic spine and posterior neck can get “tired” and we will lean, bend, twist, slump, (etc) to find what feels like a more efficient position. When this happens, the passive structures of our back, specifically the ligaments and fascia in our thoracic spine, are forced to hold us up. Over time, this can lead to change in the joints and a subsequent change in the normal curve of the upper back. In more sedentary people (desk workers), this often manifests as an increase in the curve. For those that are more athletic (ex: those circus folk that always pull down and back) or those trying to force improvement in their posture, sometimes it manifests as a flattening of the thoracic spine.
And so the cycle begins: poor posture, tired muscles, hanging on ligaments, joint changes = worse posture, bitter & tired muscles, cranky ligaments, etc, etc, etc…
Sounds terrible! Why don’t the muscles intervene?!?
Well, the key muscles that stabilize the shoulders and neck are all attached to the thoracic spine and the corresponding ribs. (Think upper/middle/lower trapezius, rhomboids, levator scapulae, etc). These muscles work together in patterns and sequences to make our movements possible.
When there is a change in the thoracic curve (whether it be more flattened or more rounded) there is also a change to the resting length of those muscles. This matters because muscles work best at an optimal length (aka in an ideal length-tension ratio). This ideal position allows for the perfect overlap of the muscle fibers, good circulation and sufficient range of contract/stretch during contraction. When this resting length-tension ratio changes, these over-stretched or somewhat shortened postural muscles are not functioning as well as they could be which causes symptoms you feel at rest or with training. In a flattened back, it might be perceived as weakness with pulling or chronic never-ending tightness after training. In a rounded back, your neck and head might feel heavy as the day goes on and your shoulder motion may feel limited overhead.
Either way, if these mid back and shoulder stabilizing muscles aren’t firing well, our body compensates and our neck muscles are then asked to help move our shoulders (not going to end well…)
But don’t despair!
Staying mobile in all directions that the thoracic spine moves will help to keep these stabilizing muscles working at an optimal level and decrease compensations that could lead to injury.
Finally - The Yoga Poses!
Below are just some of the yoga poses that will help to move the thoracic spine in all of the available planes of motion. When practicing, be curious with your movement & try to notice which directions feel loose or which directions more restricted - and move your body there. It should feel good, so don’t force any motions!
Cat/Cow
Move between the cow and cat position utilizing the breath to initiate movement.

Cow: (extension/arching in thoracic spine) performed on inhale
Start on your hands and knees in the table-top position; shoulders positioned over palms and hips directly over knees.
Draw your shoulder blades down your back letting your chest press forward, tailbone reaches to the sky arching in the back, look up letting back of neck reach into this position (so not to just collapse into neck).

Cat: (flexion/rounding of thoracic spine) performed on exhale
Return to your table top position with back neutral (flat back), shoulders positioned over palms and hips directly over knees.
Press into hands and shins allowing the rounding of the back to follow
Tuck tailbone under, pressing midback to the sky as shoulder blades spread apart, and bring head down leading with a chin tuck (chin to neck)
Cat/Cow (side to side)
(Moving spine into side bending position)

1.
Start in table top position.
Hips over knees. Shoulders over hands.

2.
Begin by pressing ribs to the side, pelvis & collarbone curl in the opposite direction, creating a ‘C’ shape with trunk. Breathe into (inhale) your sidebody, letting the ribs on that side expand.

3.
Exhale back to neutral position, and repeat one other side.
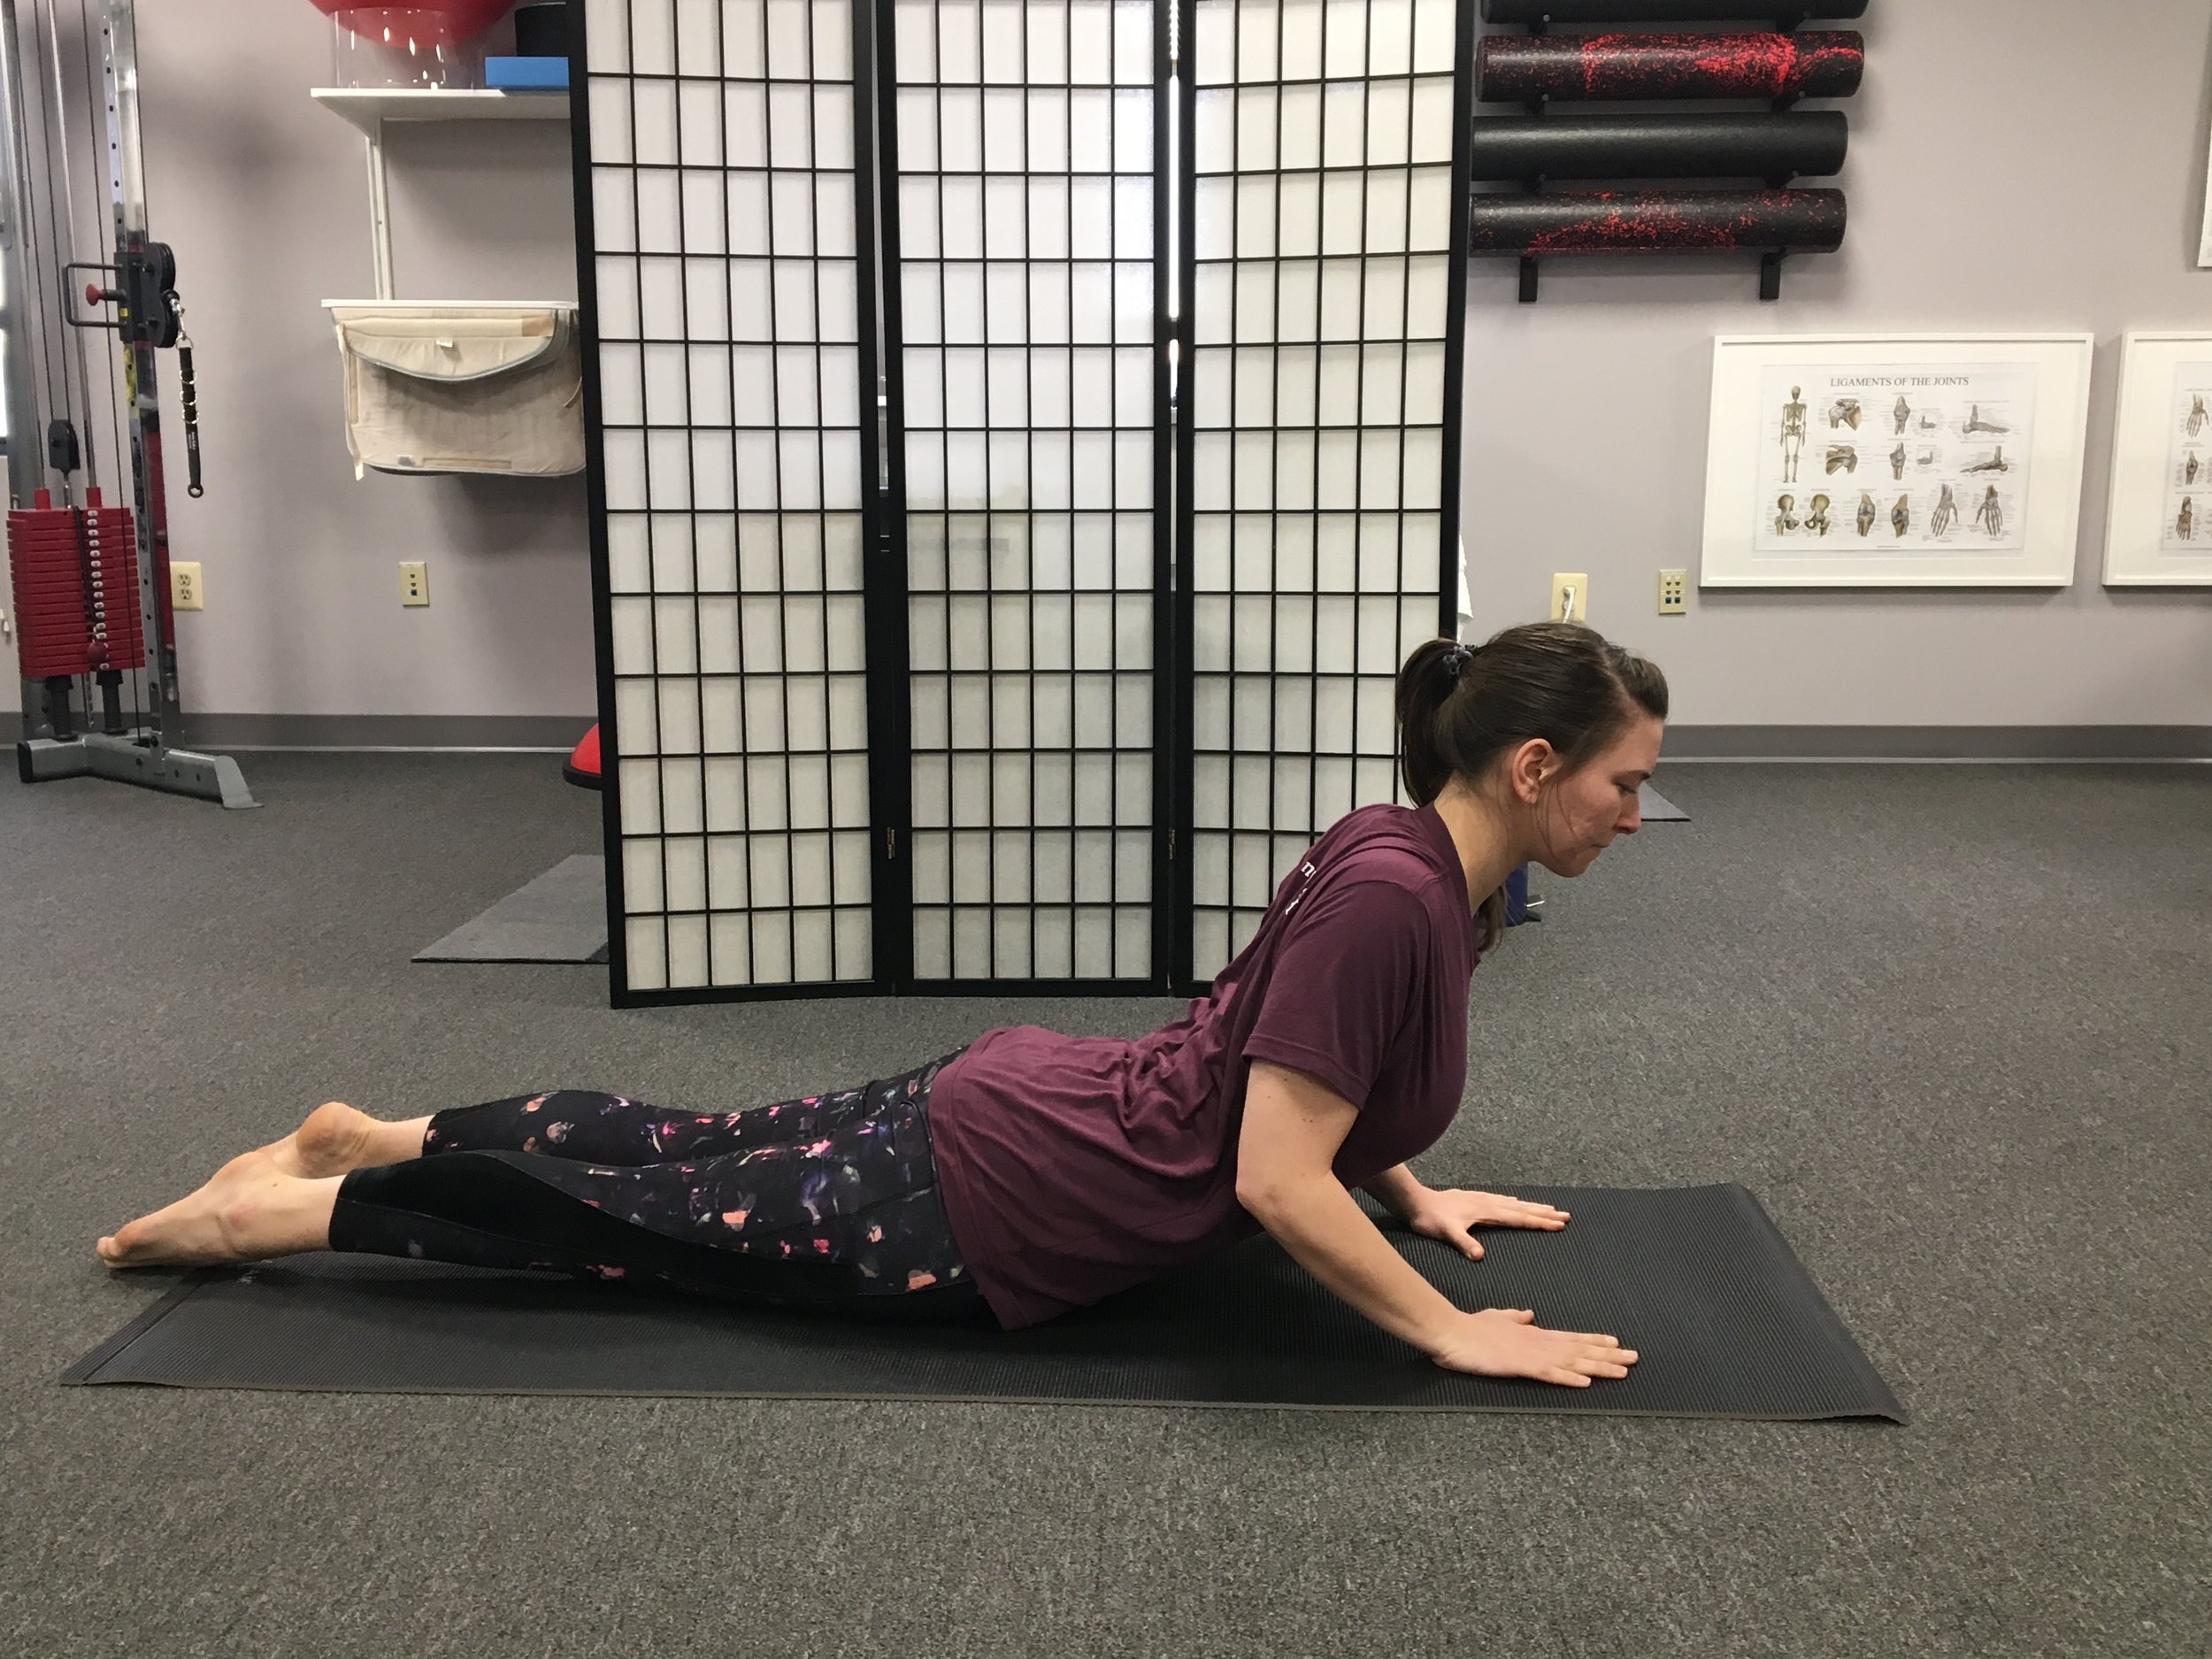
Cobra Pose: ( mid back extension)
Begin on your stomach (lying belly down), with hands placed under shoulders. Finger tips aligned with top of shoulder, forehead to mat, bring feet and legs together.
Engage lower body and core first; toe nails press into ground, exhale, pubic bone presses into ground to engage core
Shoulder blades slide down your back and together, elbows squeeze in, head lifts and back of neck lengthens with a slight chin tuck reaching the spine forward and up. Chest lifts off of ground with inhale.
Note: you should be able to lift hands off ground for a microsecond, to ensure engagement of back.
On the next inhale, while maintaining engagement, slowly straighten arms to your fullest expression of the cobra, straightening as high as your body is comfortable for this day.

Child’s Pose: (spinal flexion)
From table top position, bend knees and rest buttocks back on heels. Forehead comes to the ground. Walk arms in front you (overhead reach) or you can bring arms to your side as shown (for increased flexion in thoracic spine), letting shoulder blades spread apart.

While at your side, arms can also relax with back of hands resting on lower back. Choose the version that feels best in your body today.

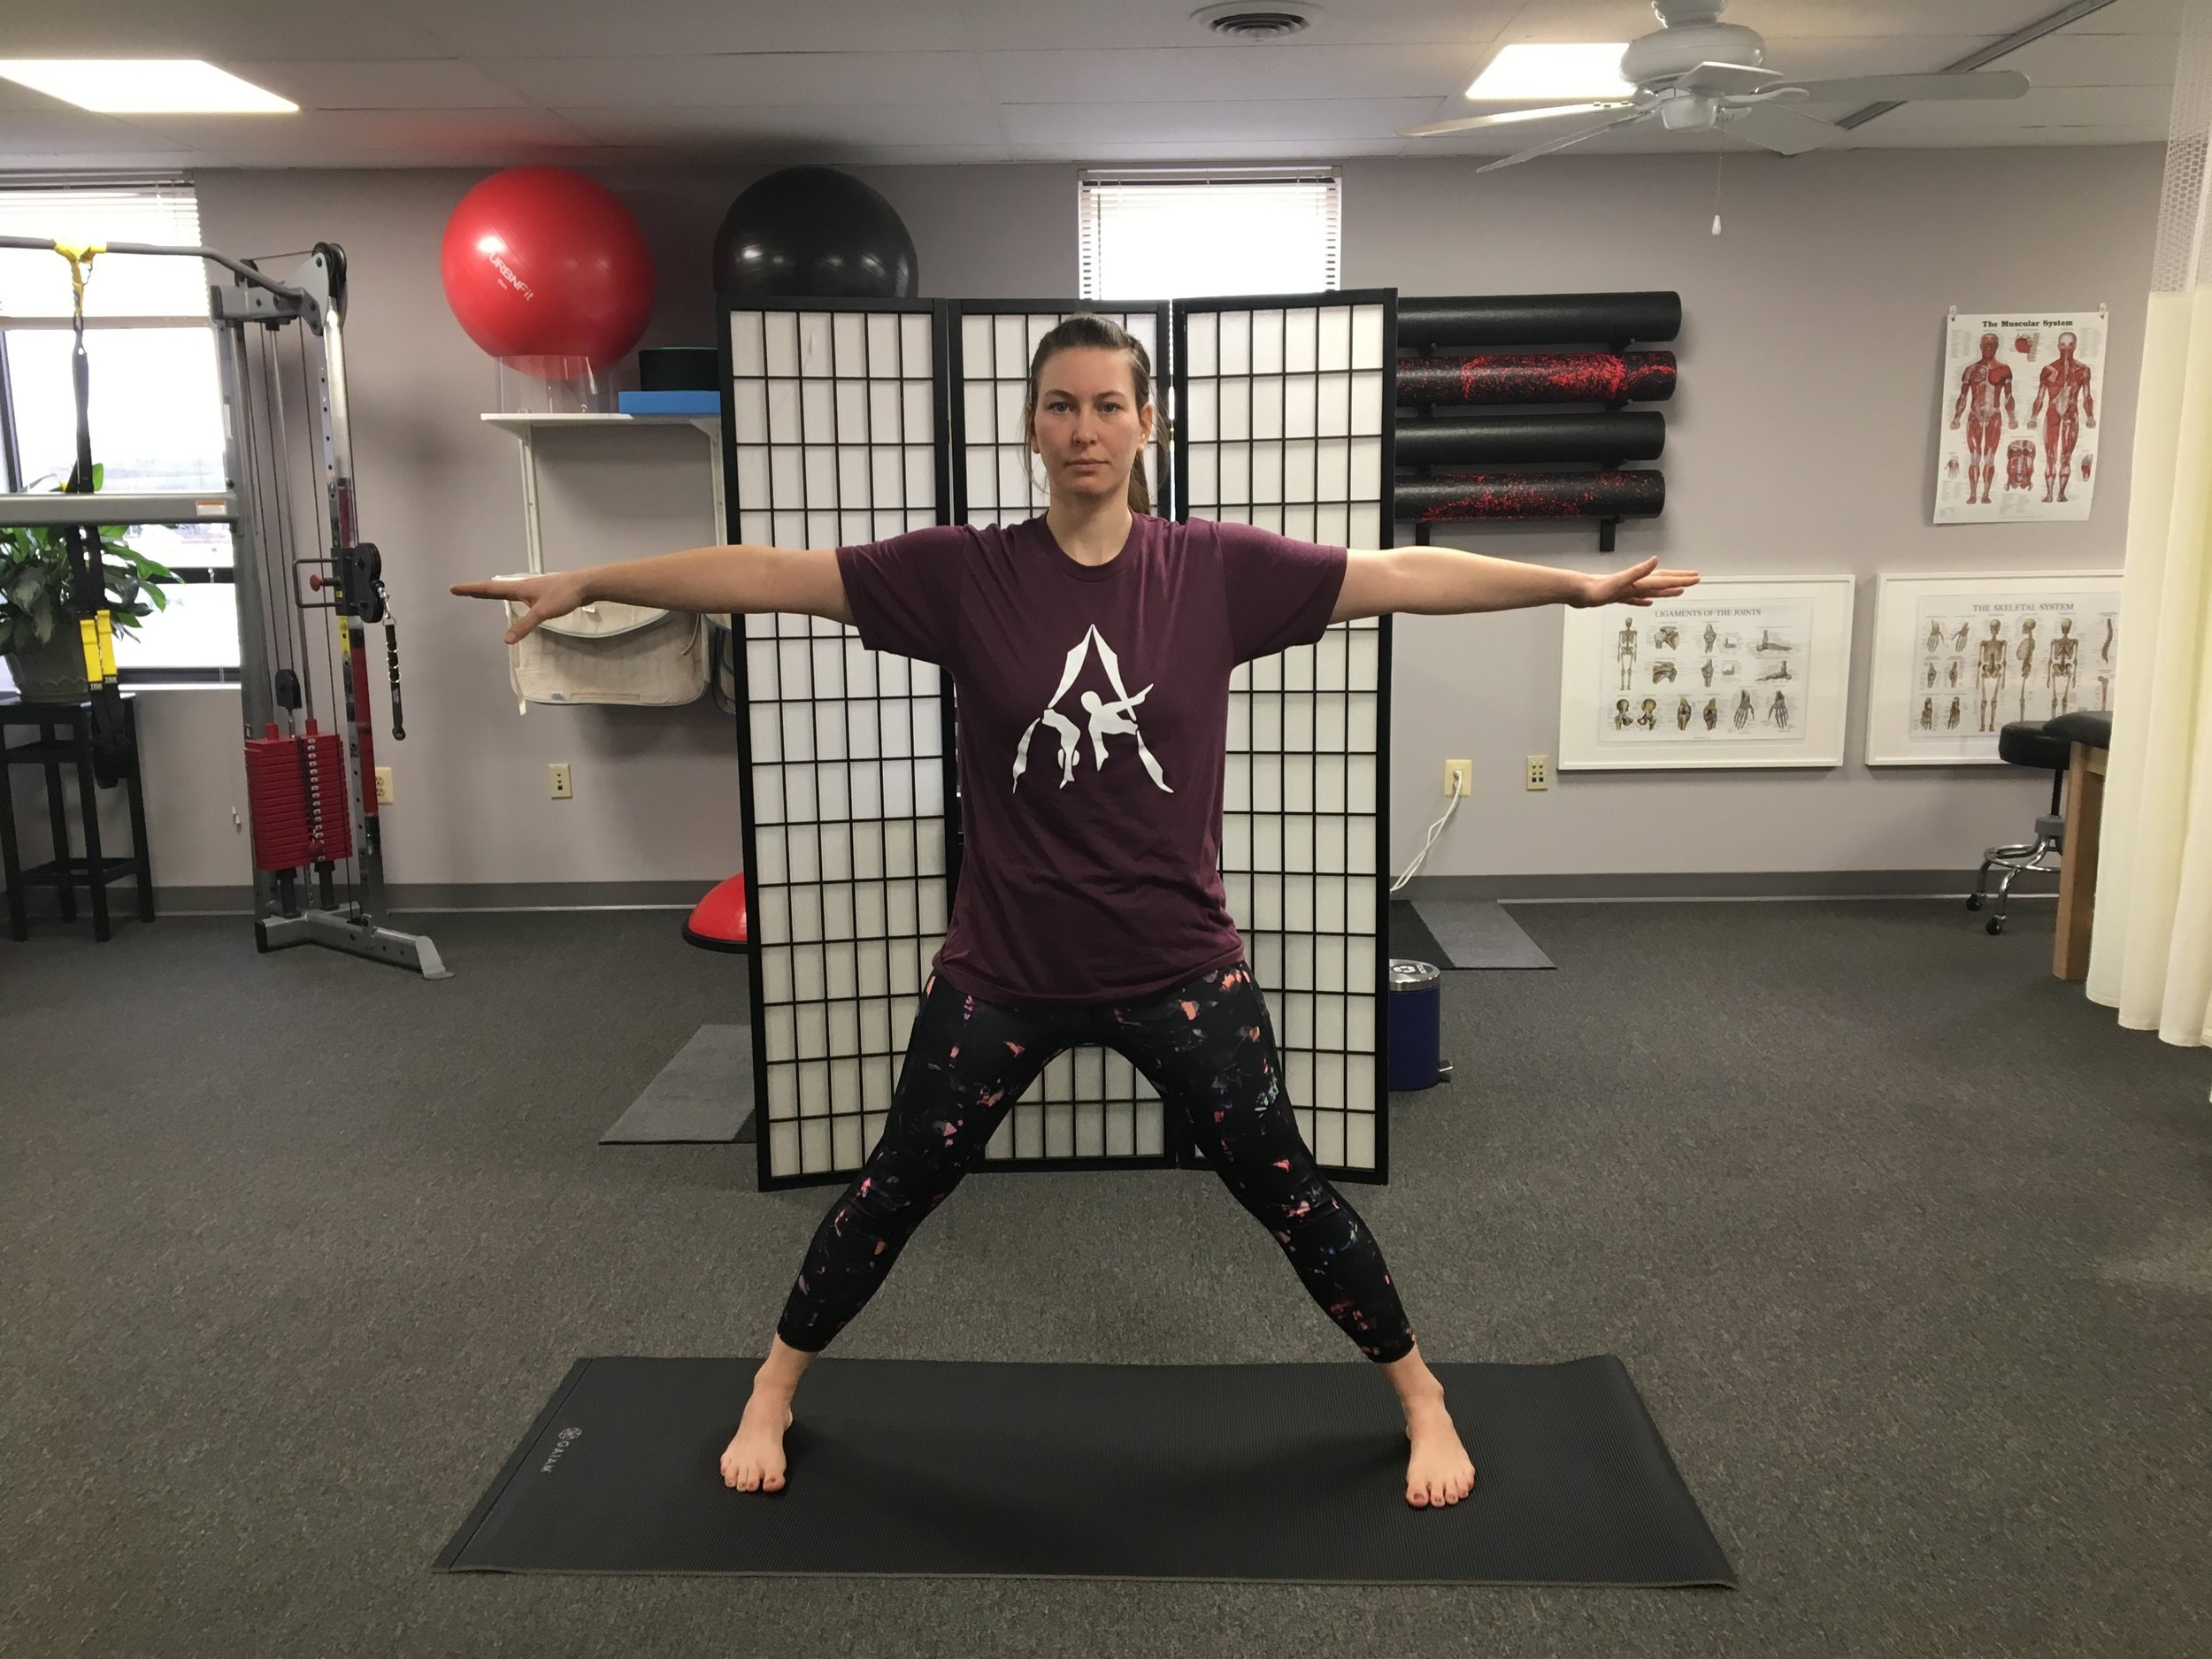
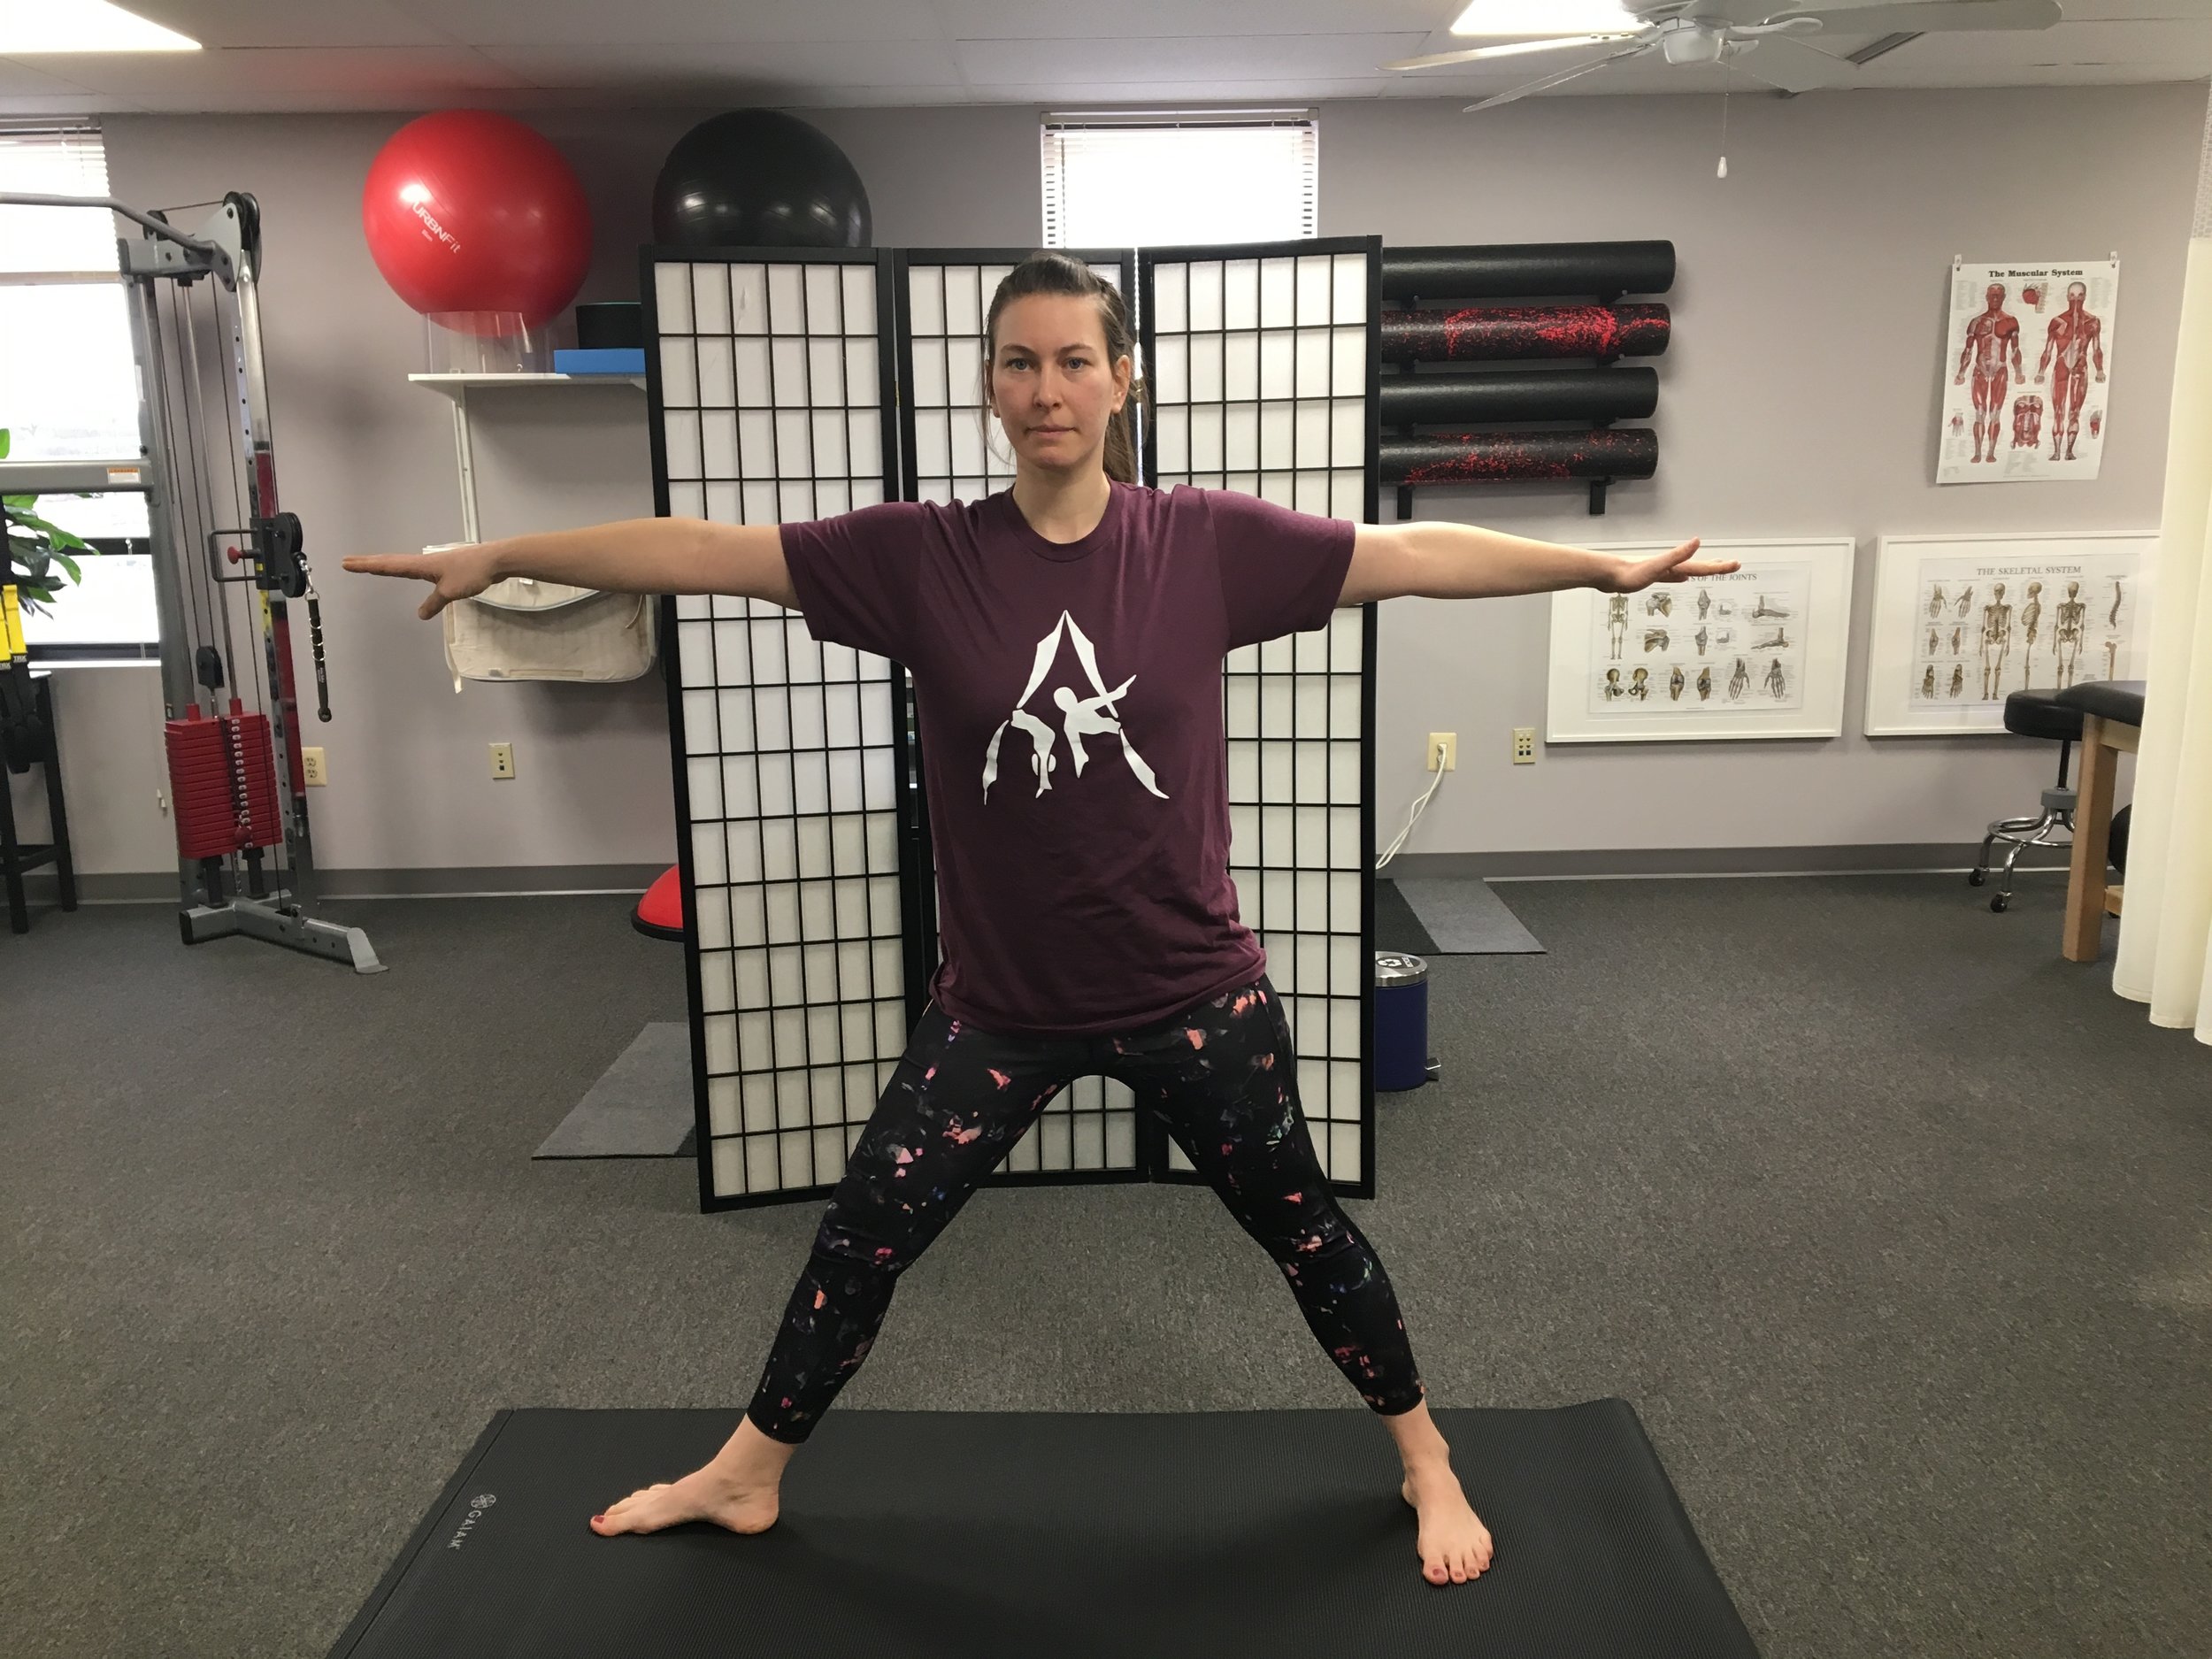
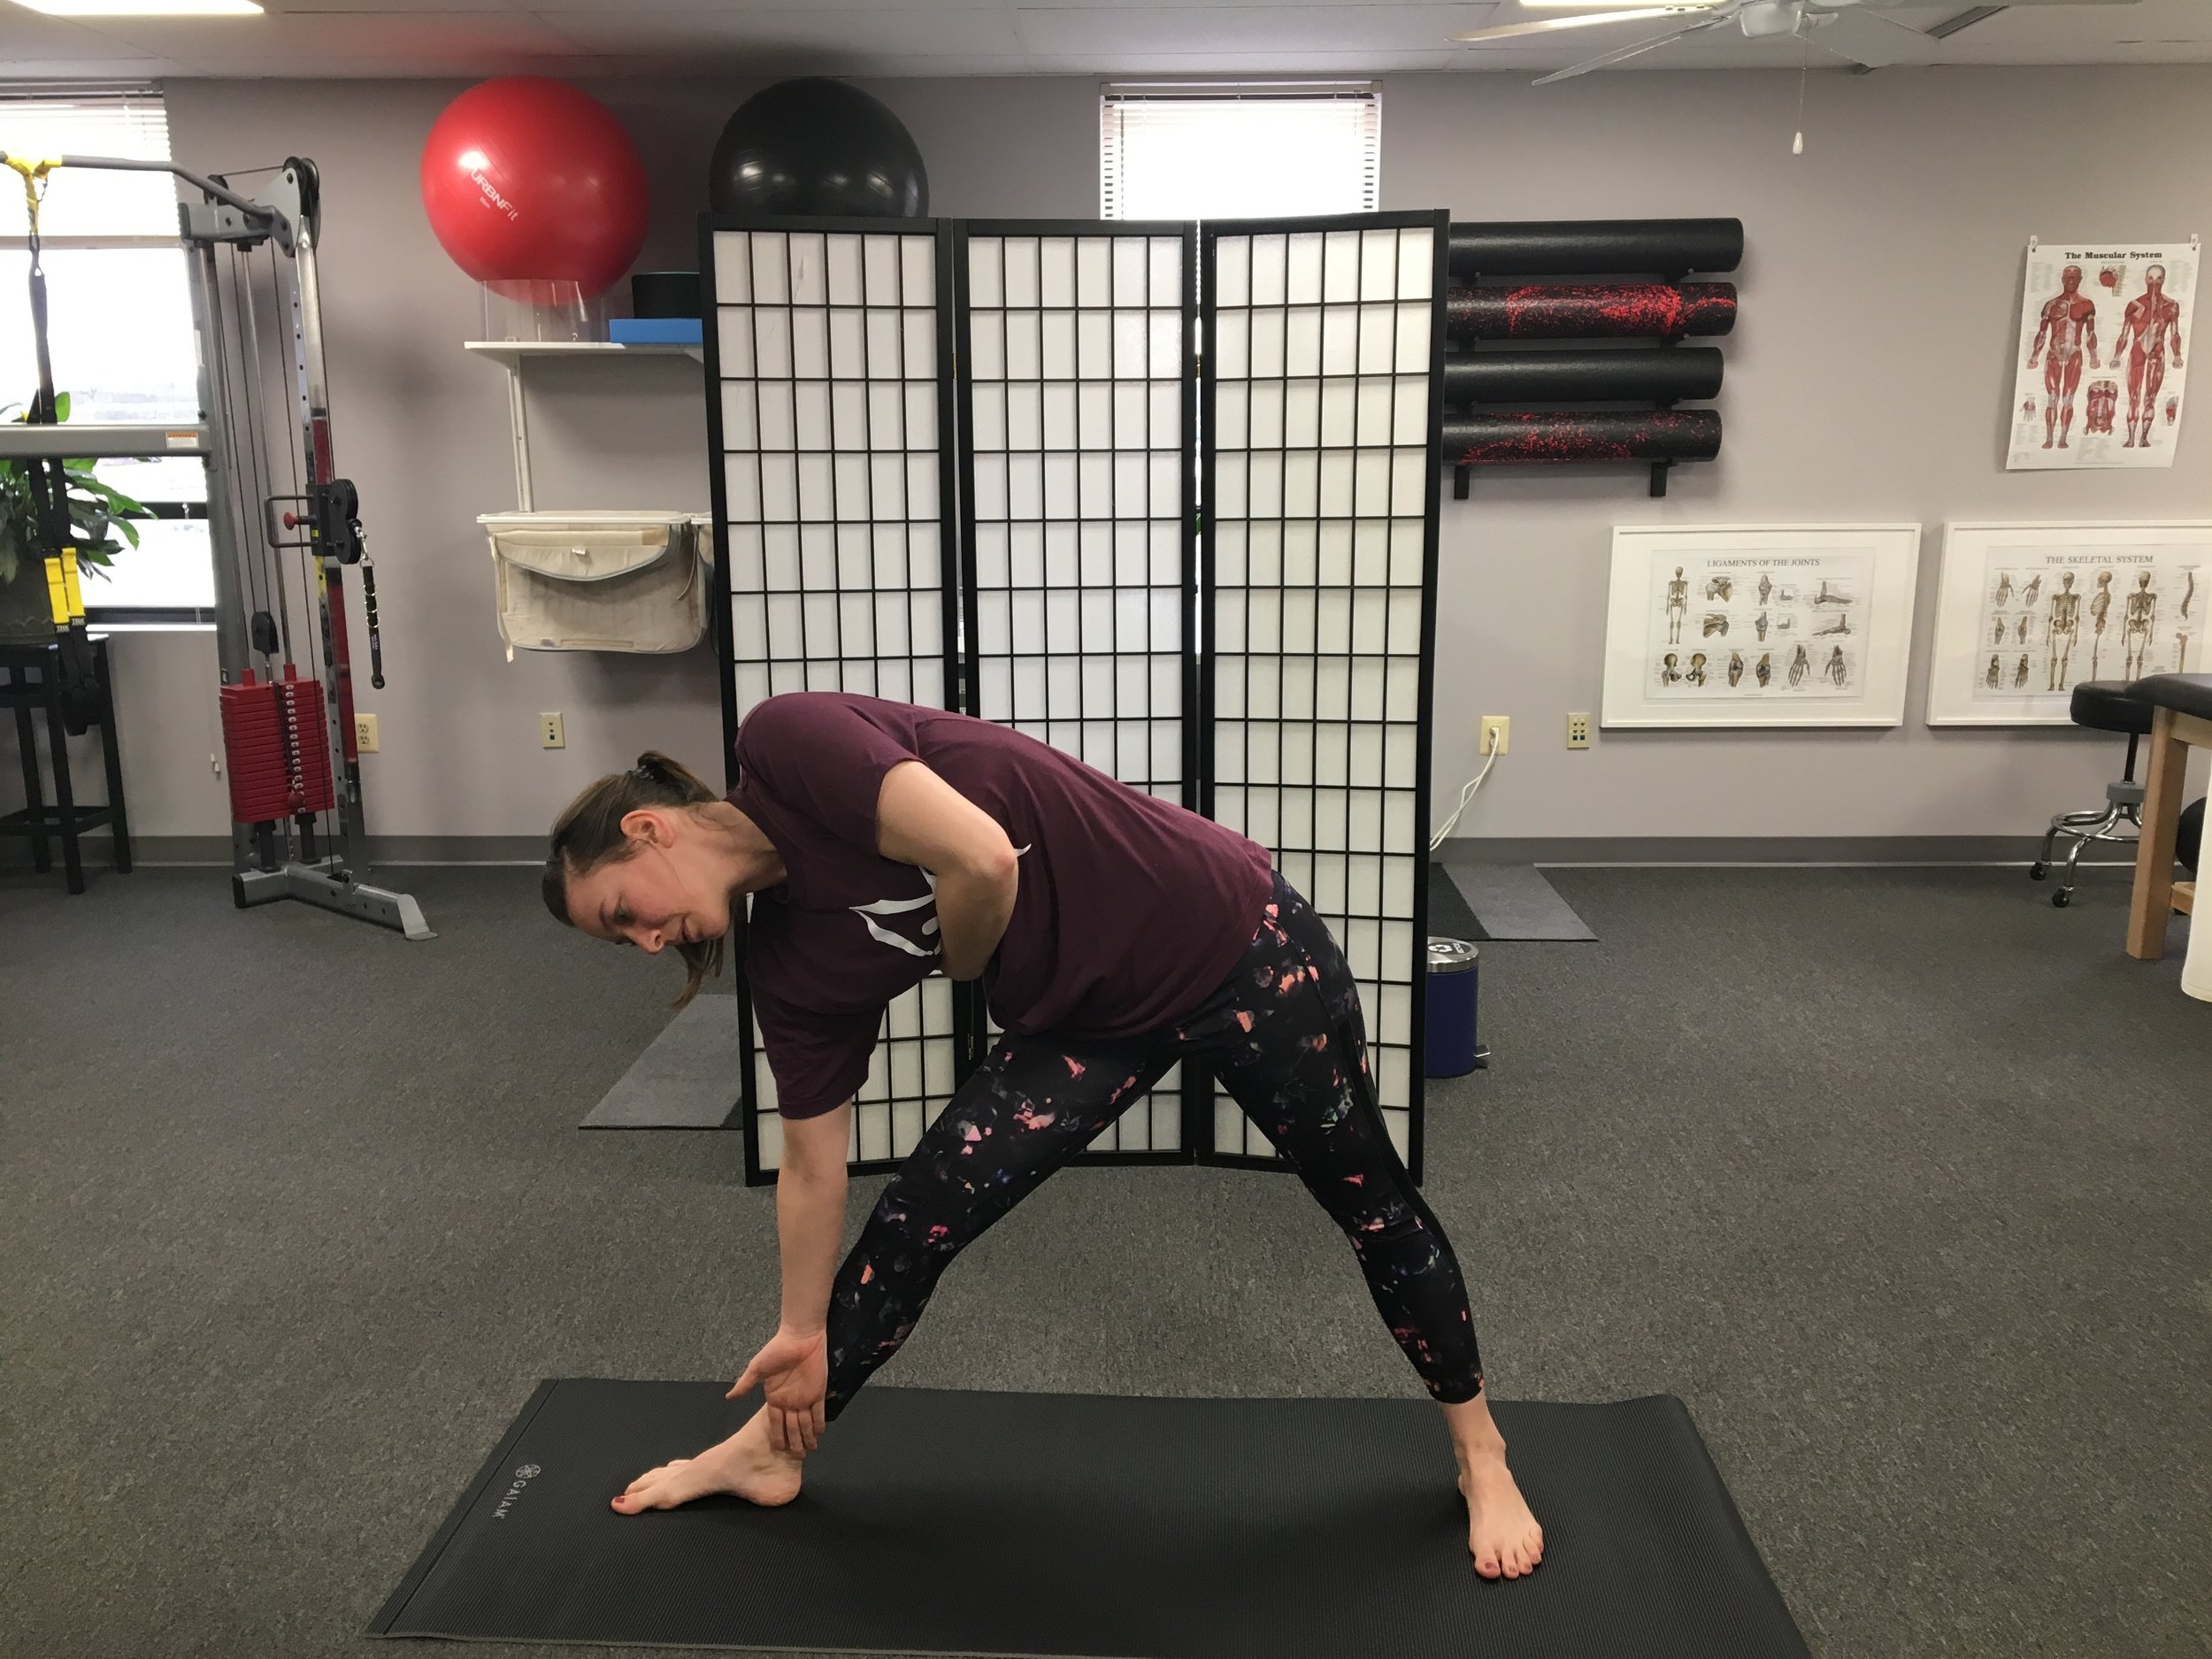
Triangle Pose: (rotation and sidebend)
Begin facing the side of your mat with arms reaching out at shoulder height, step your feet out wide so ankles are aligned under wrists (distance of legs can be less depending on your comfort level for the day).
Pivot right foot on heel so toe is now facing front of your mat. Feet should now be aligned so your front foot’s heel is bisecting the arch of your back foot.
Inhale as you reach your right arm as far forward as you can control. Exhale, bringing right arm down so back of hand rests on inner leg.
Take your top arm and hug yourself, inhale as you begin to reach this arm up to the sky, allowing your hand to cue rotation of the trunk as it glides over your rib cage. Use the back of your bottom hand to help with this rotation by pressing into your right leg and spiraling the rib cage up. Look up, gazing at the thumb of your top hand.
Firmly plant into your feet, finding even pressure under ball of big toe, pinky toe, and heel. Try not to collapse into your sidebody, let your core hold you up. Hold this position for several breaths.
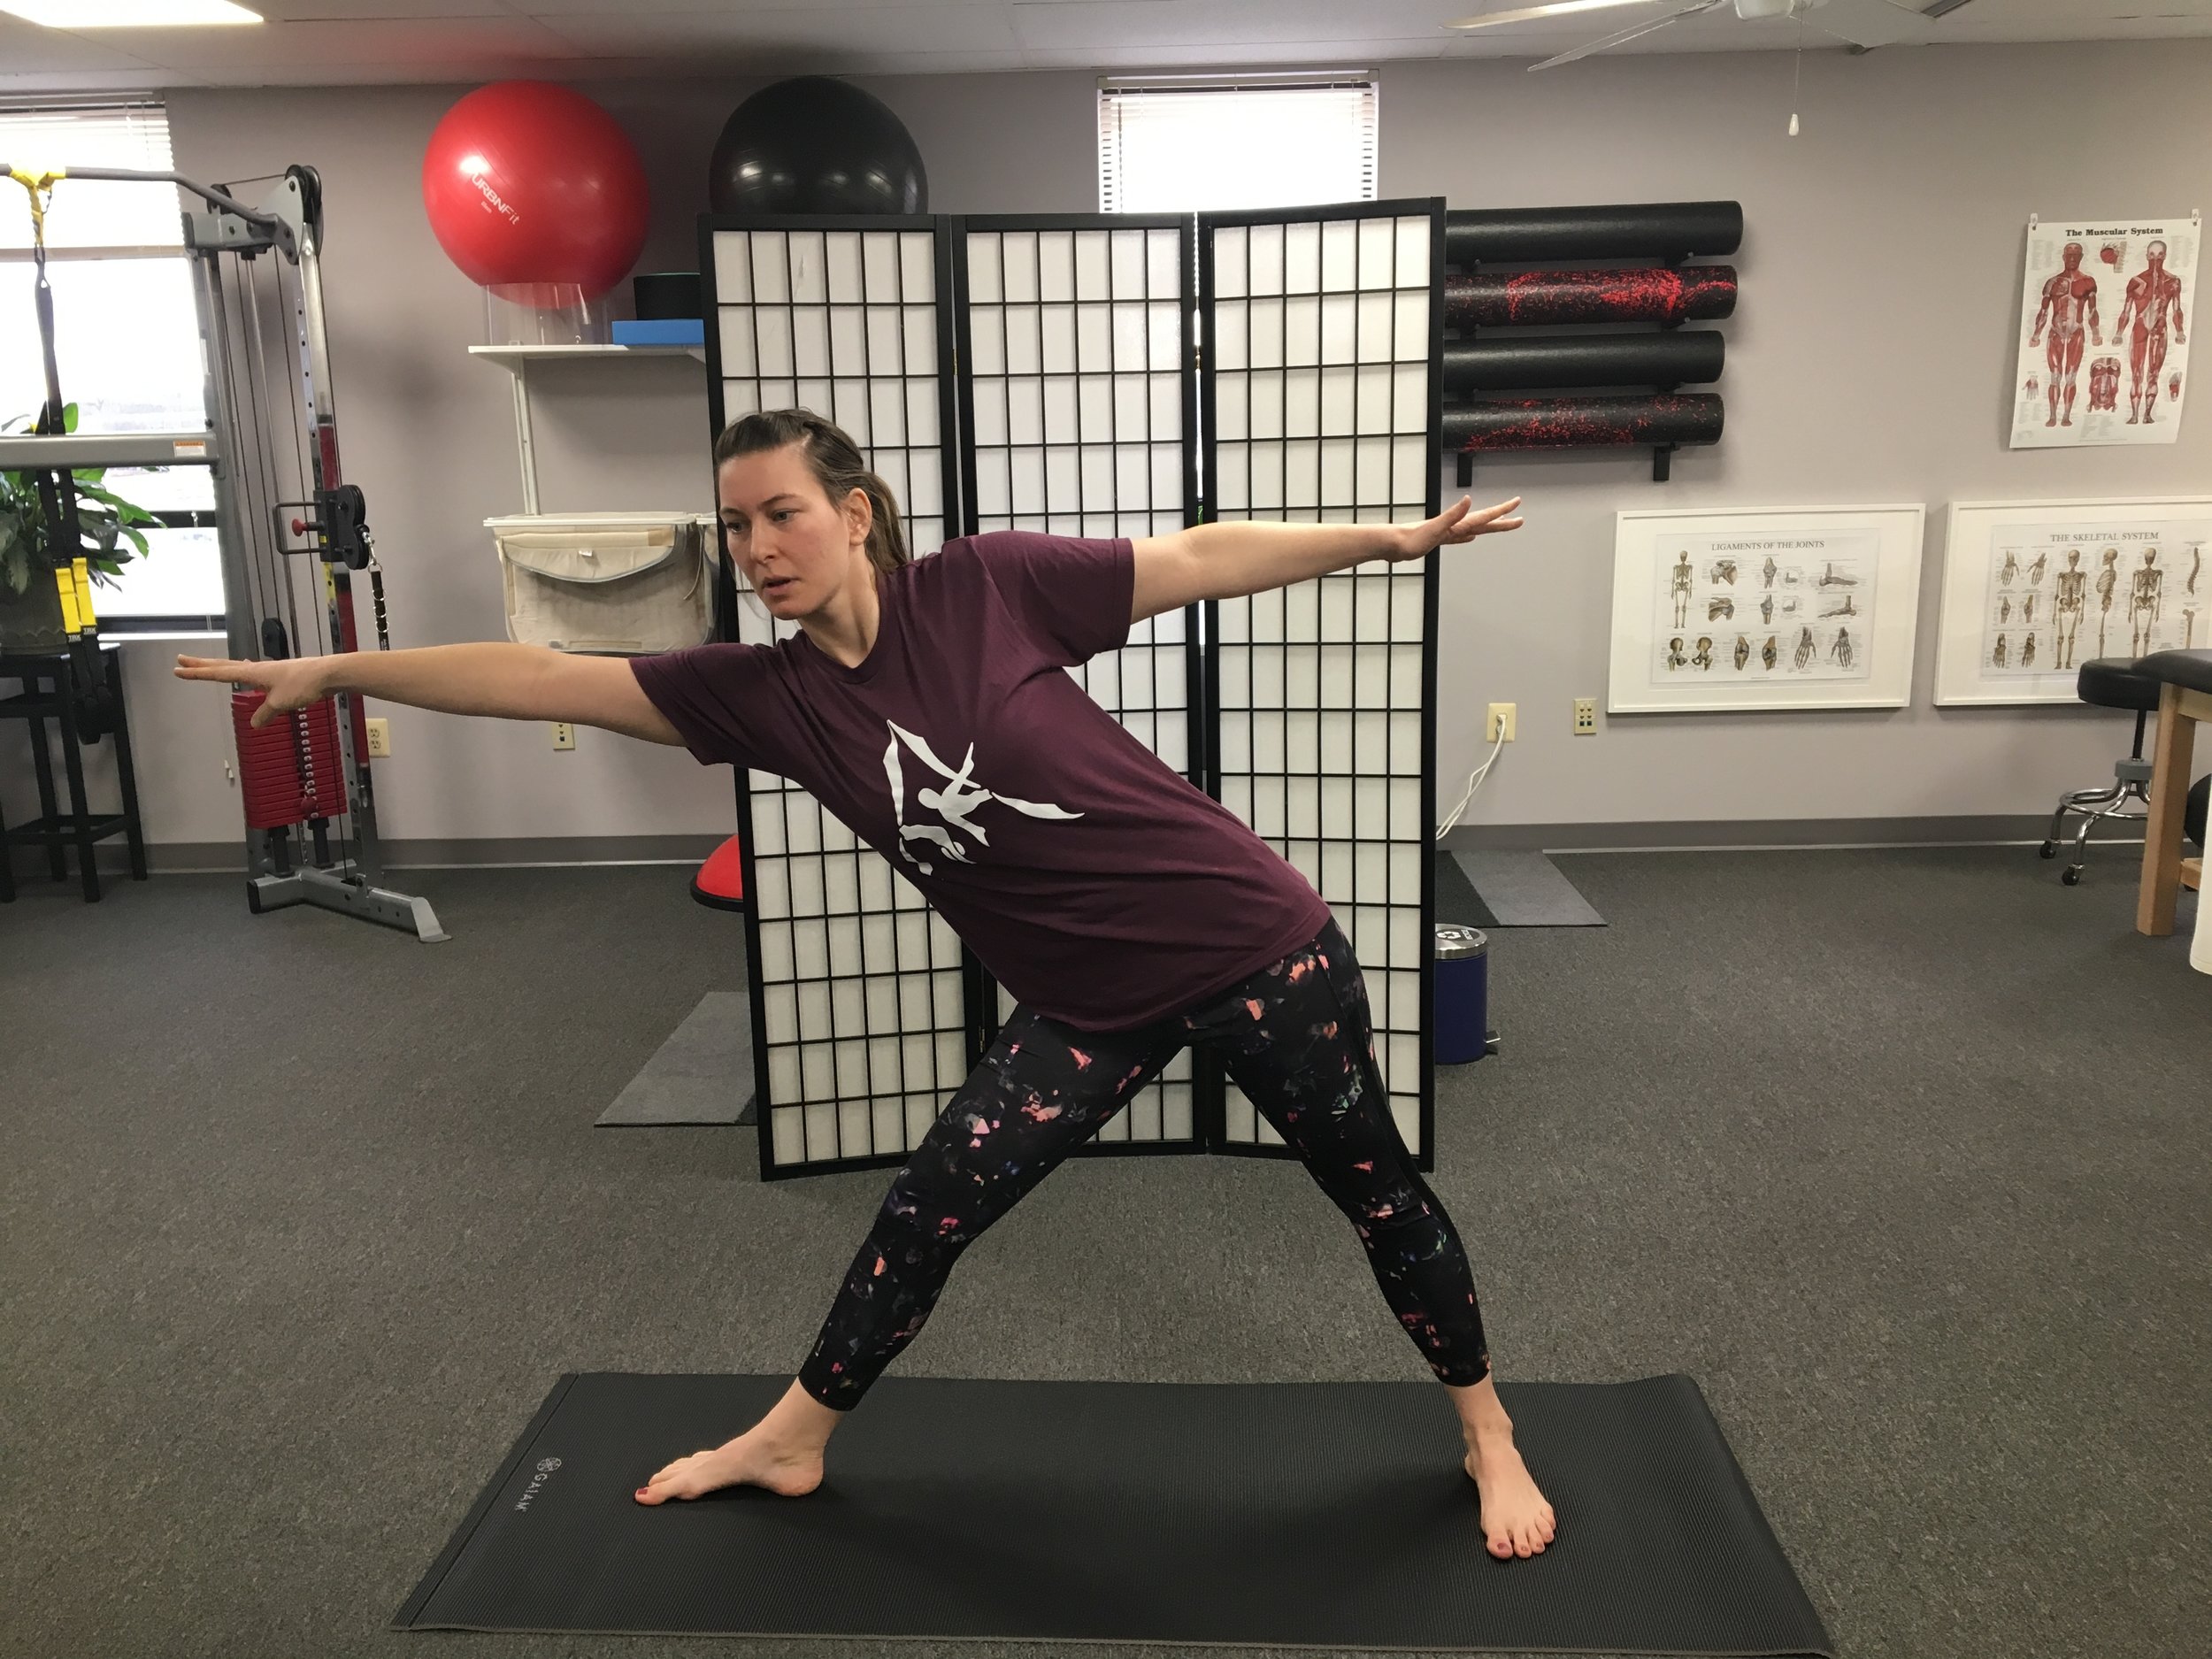
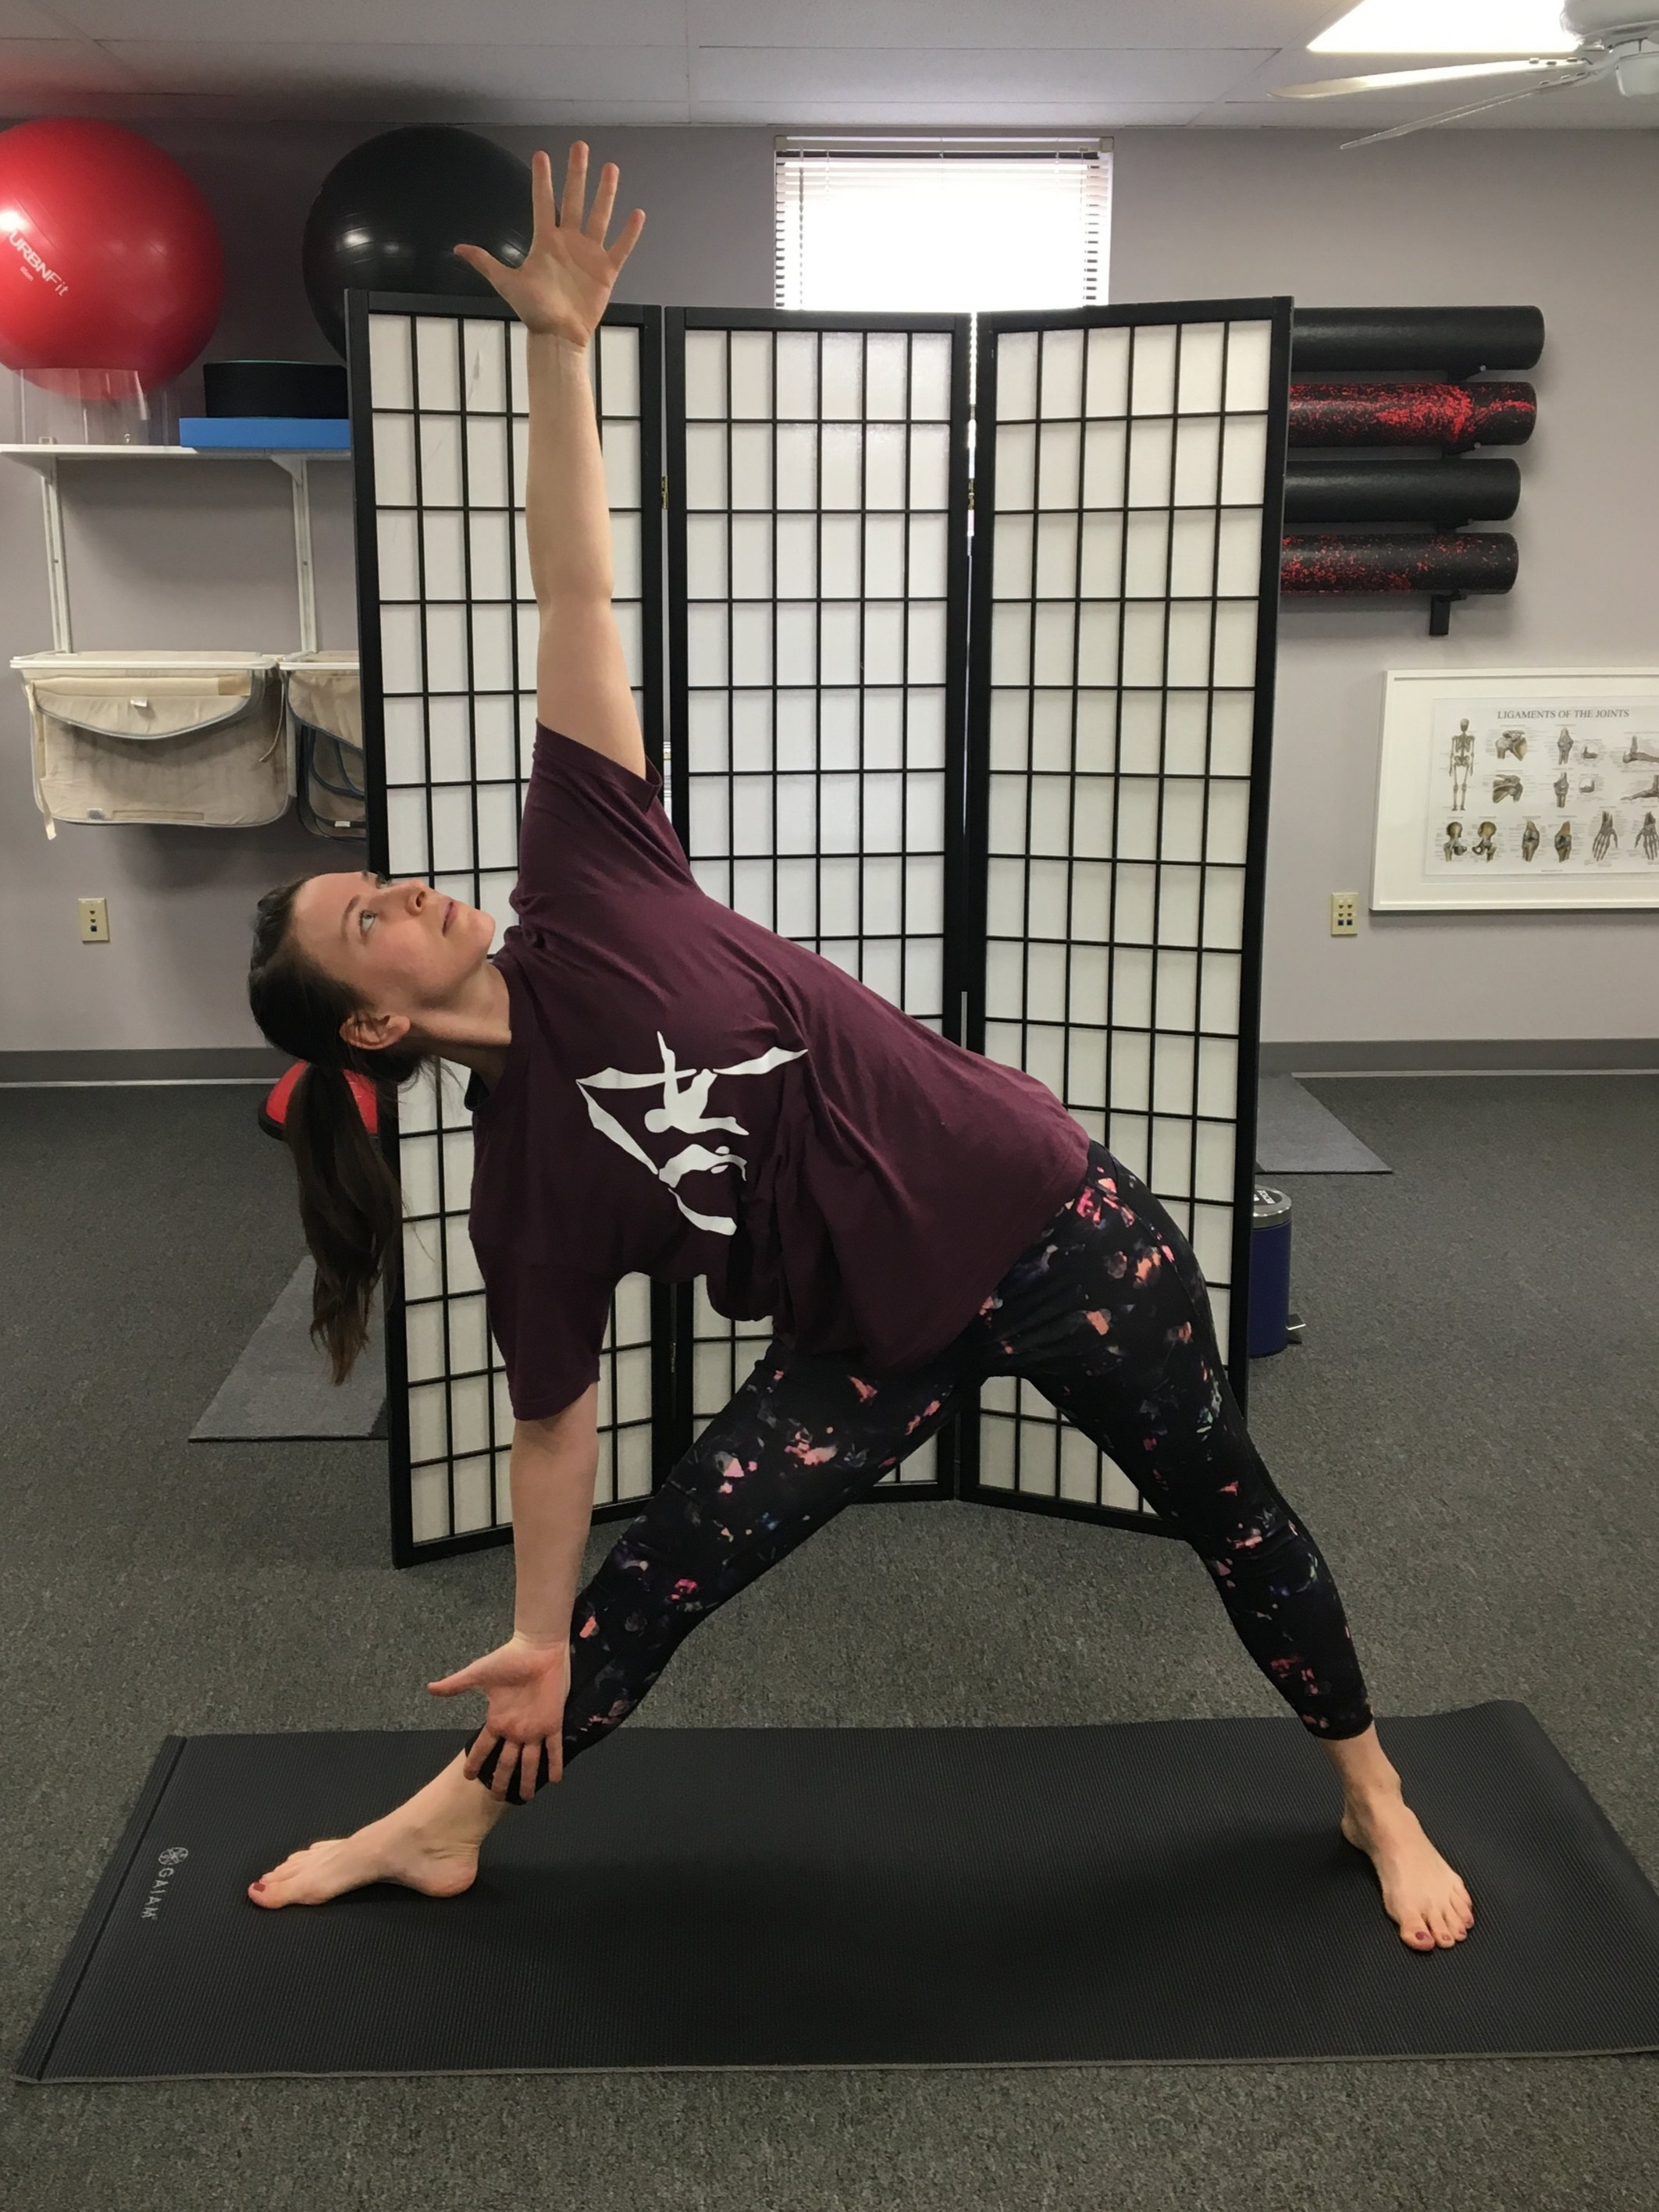
Release pose on inhale: letting your top arm lift you out of position as if someone were pulling you back up to center from your hand, find a microbend in front knee to help.
This post was authored by Sarah Caffey PT, DPT, CEAS, RYT.
(And edited to become more awkward & wordy by Angie)
InterestEd in learning more about Sarah? More about Yoga? Or just excited to schedule your next appointment?
Get clicking!