Exercise your postural muscles:
There's a long list of muscles involved in supporting the body's joints and structures. If you are really struggling with pain or postural dysfunction, it's always best to seek the advice of a qualified physical therapist or personal trainer.
That said - in most of us, there are some common areas of weakness and I'll detail some exercises here that you can try if you want to increase your postural awareness and fitness. You'll notice that many of these muscles are on the back of the body - this is no accident! When everything that we do is in front of us, the muscles that need the most strengthening are the ones that resist those forward forces!
Quick note: This is not by any means an extensive list. There are dozens of good postural exercises out there! These exercises are several that I prescribe to my patients and also do in my weekly conditioning routine.
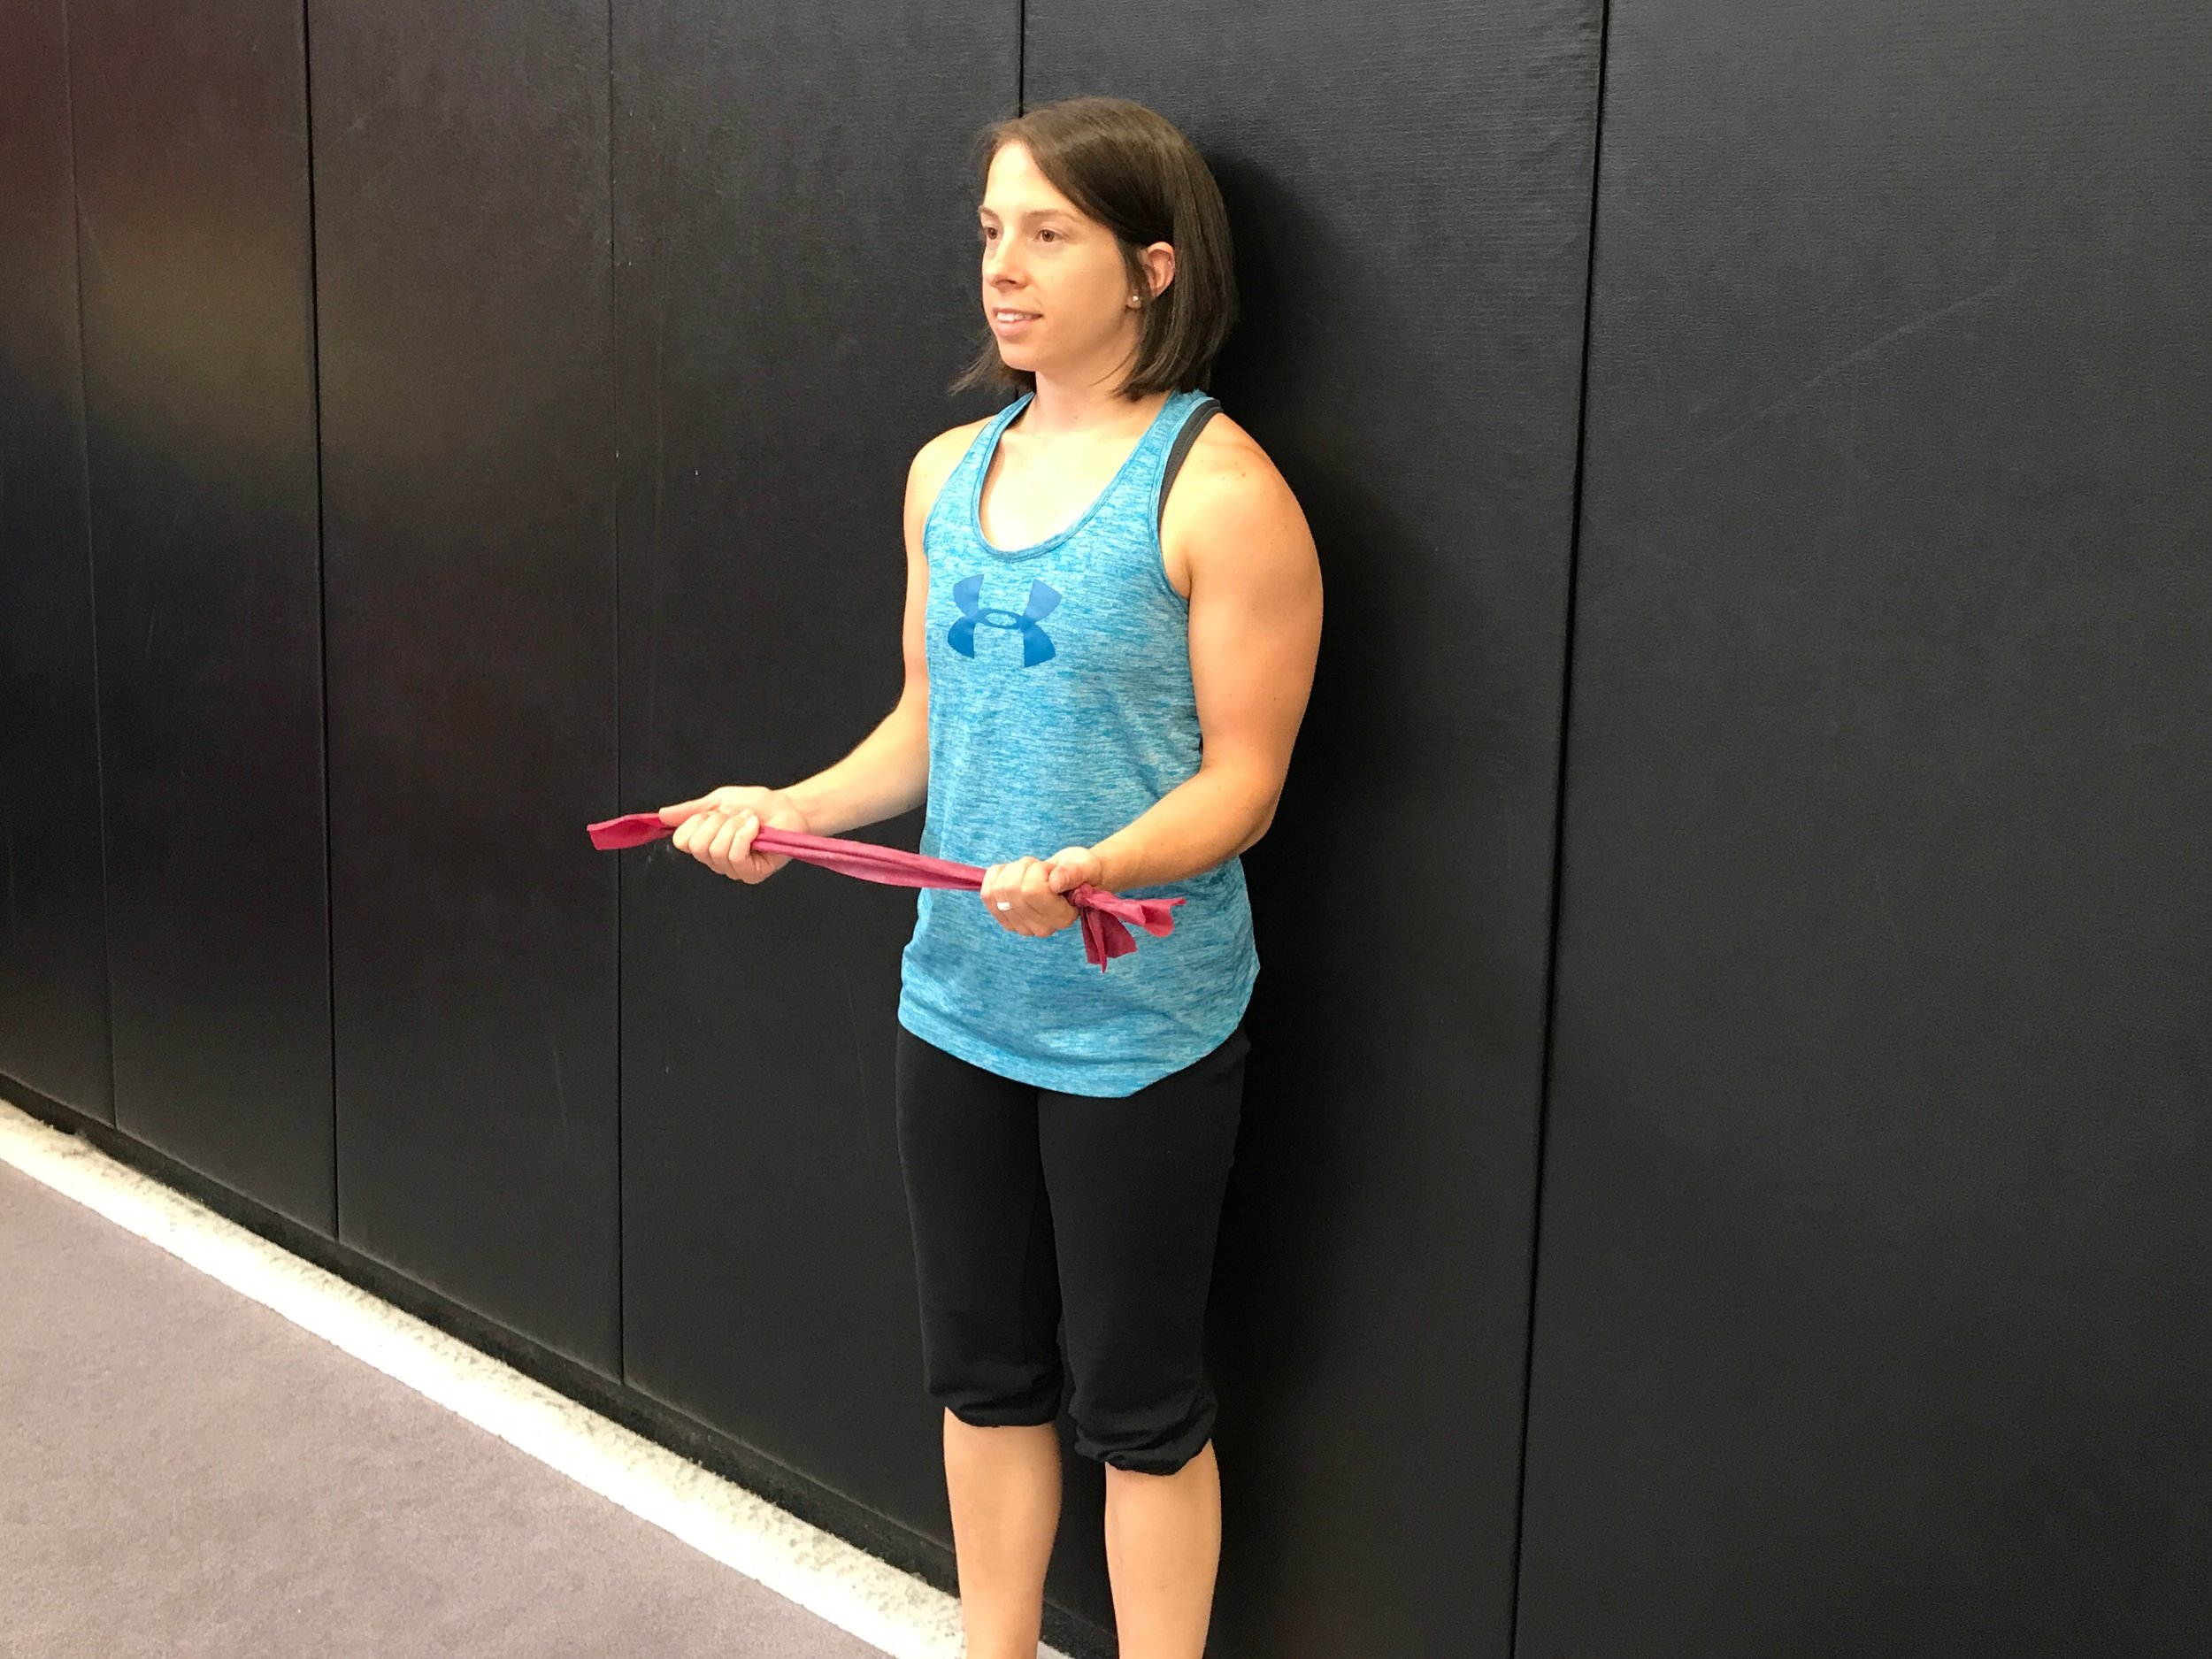
Scap Retracts (Part 1):
These next two exercises work the following muscles: rhomboids, middle trapezius, infraspinatus and teres minor.
Starting position: Standing against the wall with your back flat, head neutral. Hold the band with palms up, elbows bent to 90 degrees.
Exercise: Squeeze the shoulder blades together and twist the arms out. Then return to the starting position. (Be sure to keep the head neutral and body upright.) Be certain that the elbow remain bent and that the rotation is coming from the shoulders and not extension of the elbows.
Dosage: Do for 2 straight minutes (this is an endurance exercise!). Perform 3 times a week.
Scap Retracts (Part 2):
Starting position: Standing against the wall with your back flat, head neutral. Hold the band with palms up. The elbows can be bent (as shown) or you can hold the arms more straight with the band down by the waist.
Exercise: Squeeze the shoulder blades together and raise the arms halfway up and out to the sides. Then return to the starting position. (Be sure to keep the head neutral and body upright.)
Dosage: Do for 2 straight minutes (this is an endurance exercise!). Perform 3 times a week.
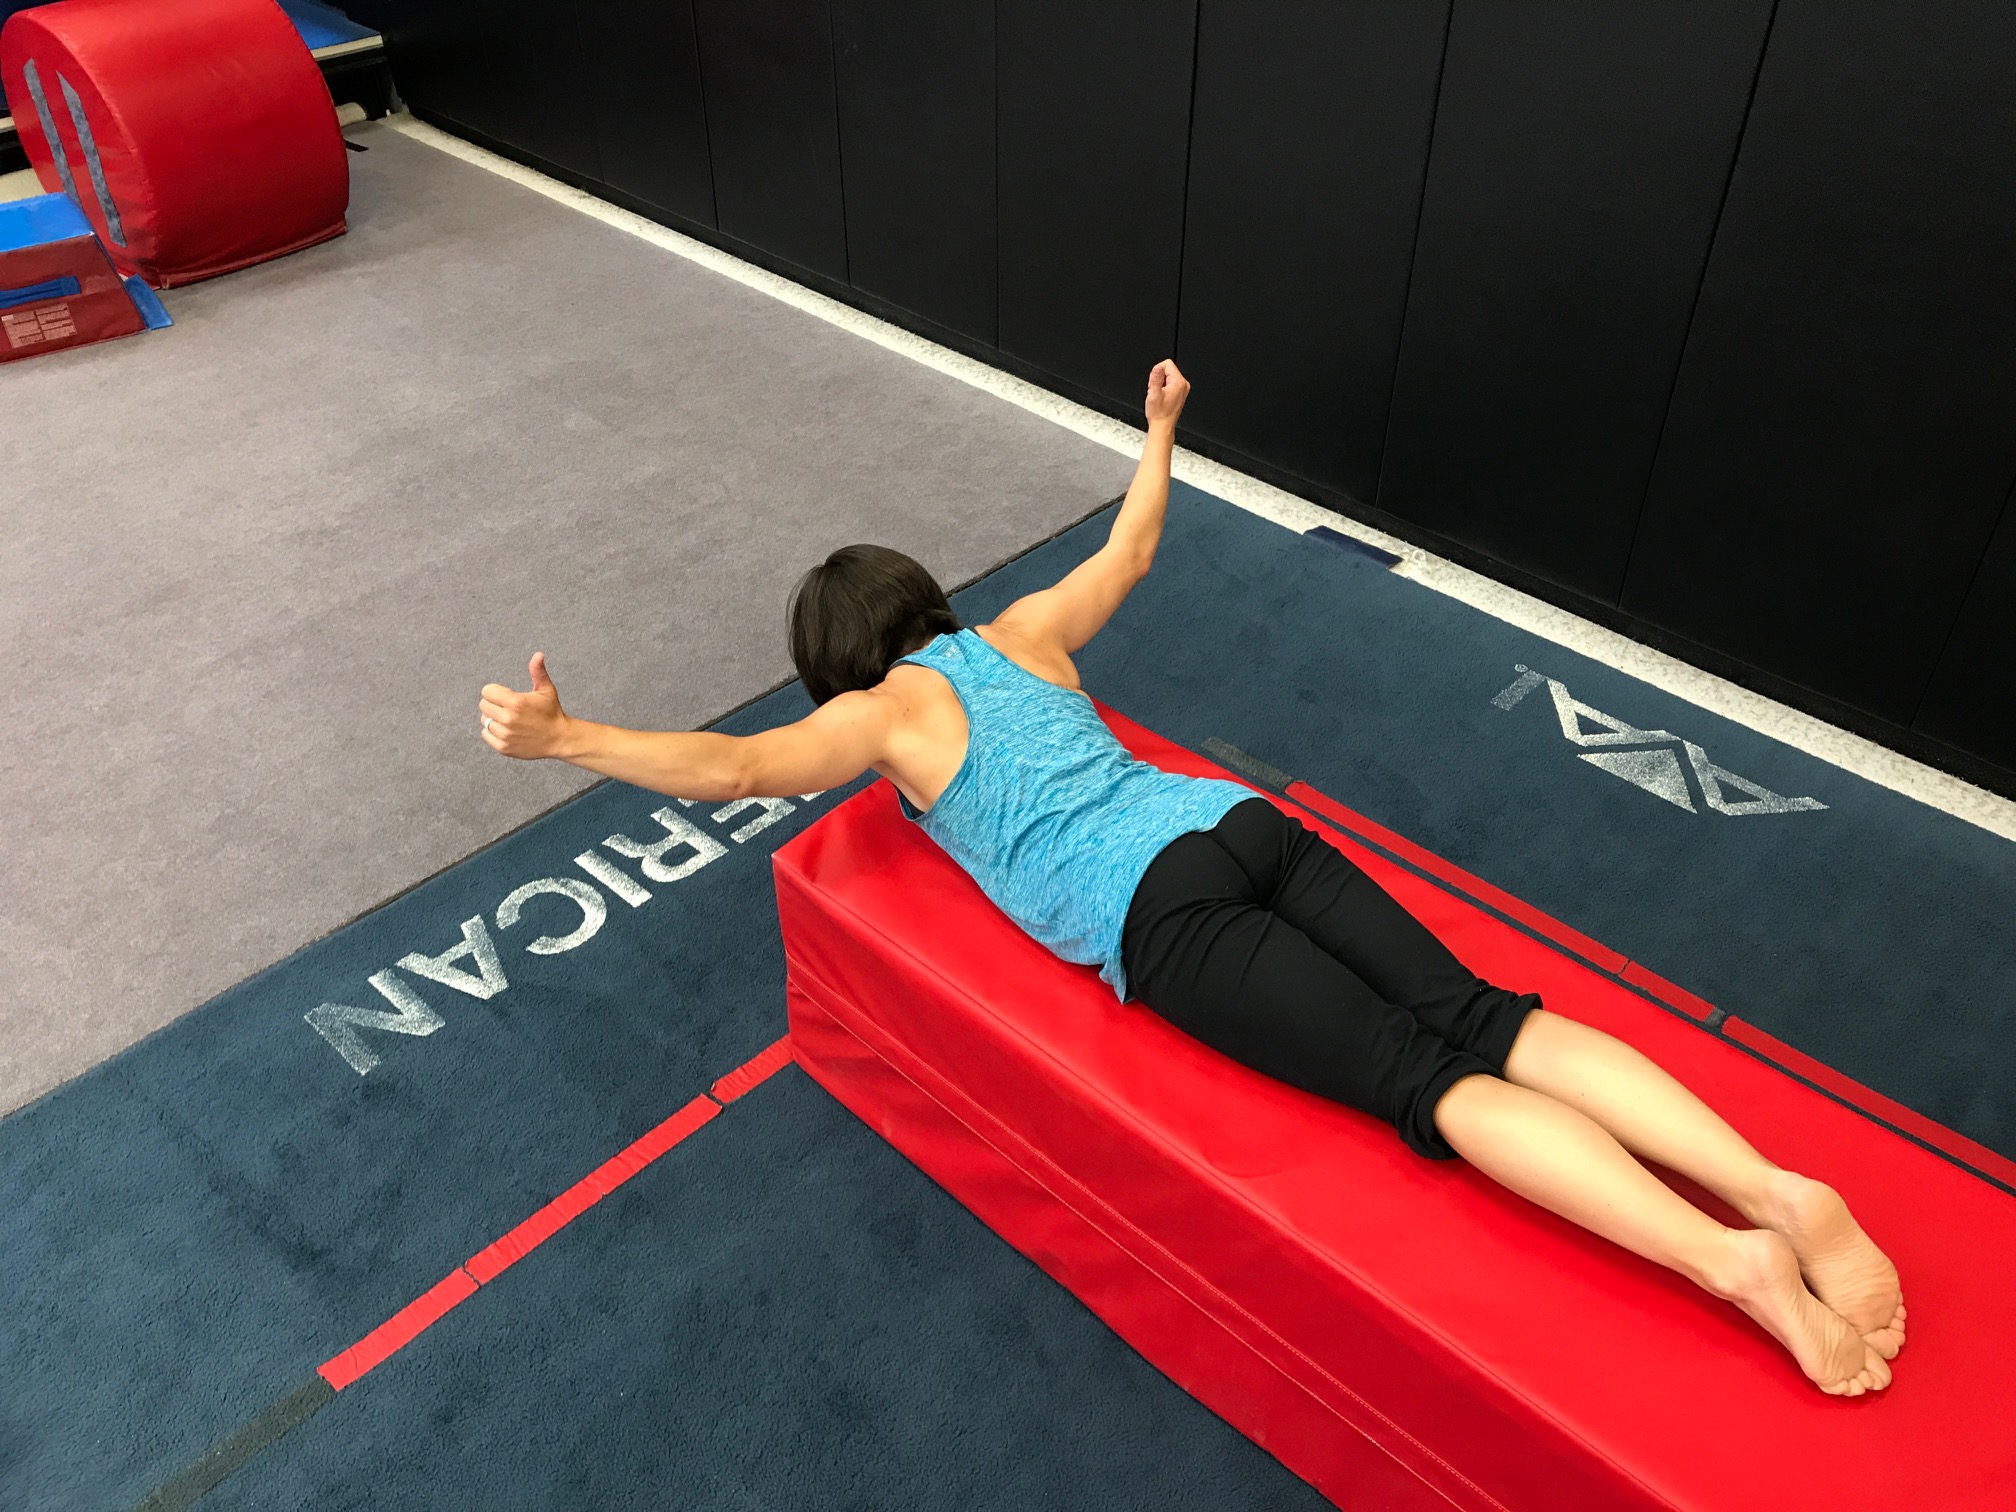
Prone YTI:
This exercise works the following muscles: infraspinatus, teres minor/major, middle trapezius, lower trapezius, rhomboids, posterior deltoid, and thoracic paraspinals,
Starting position: Can be done on the floor, on a weight lifting bench, on a PT table or on a gymnastics block (as shown). Laying on your stomach, head neutral, with your arms hanging over the edge. (If you are at home, using the corner of the bed works great too!).
With the thumbs pointing up, squeeze the shoulder blades together and raise the arms into a "Y" position. Then return to the starting position.
With the thumbs pointing up, squeeze the shoulder blades together and raise the arms into a "T" position. Then return to the starting position.
With the thumbs pointing up, squeeze the shoulder blades together and raise the arms into an "I" position. Then return to the starting position.
Dosage: Each series of "Y-T-I" motions count as one repetition. Perform 10-15 repetitions, Do 3 times a week. Initially, do not use weight to ensure appropriate form. Over time, as the exercise becomes easier, add 1# to each hand and build up gradually!
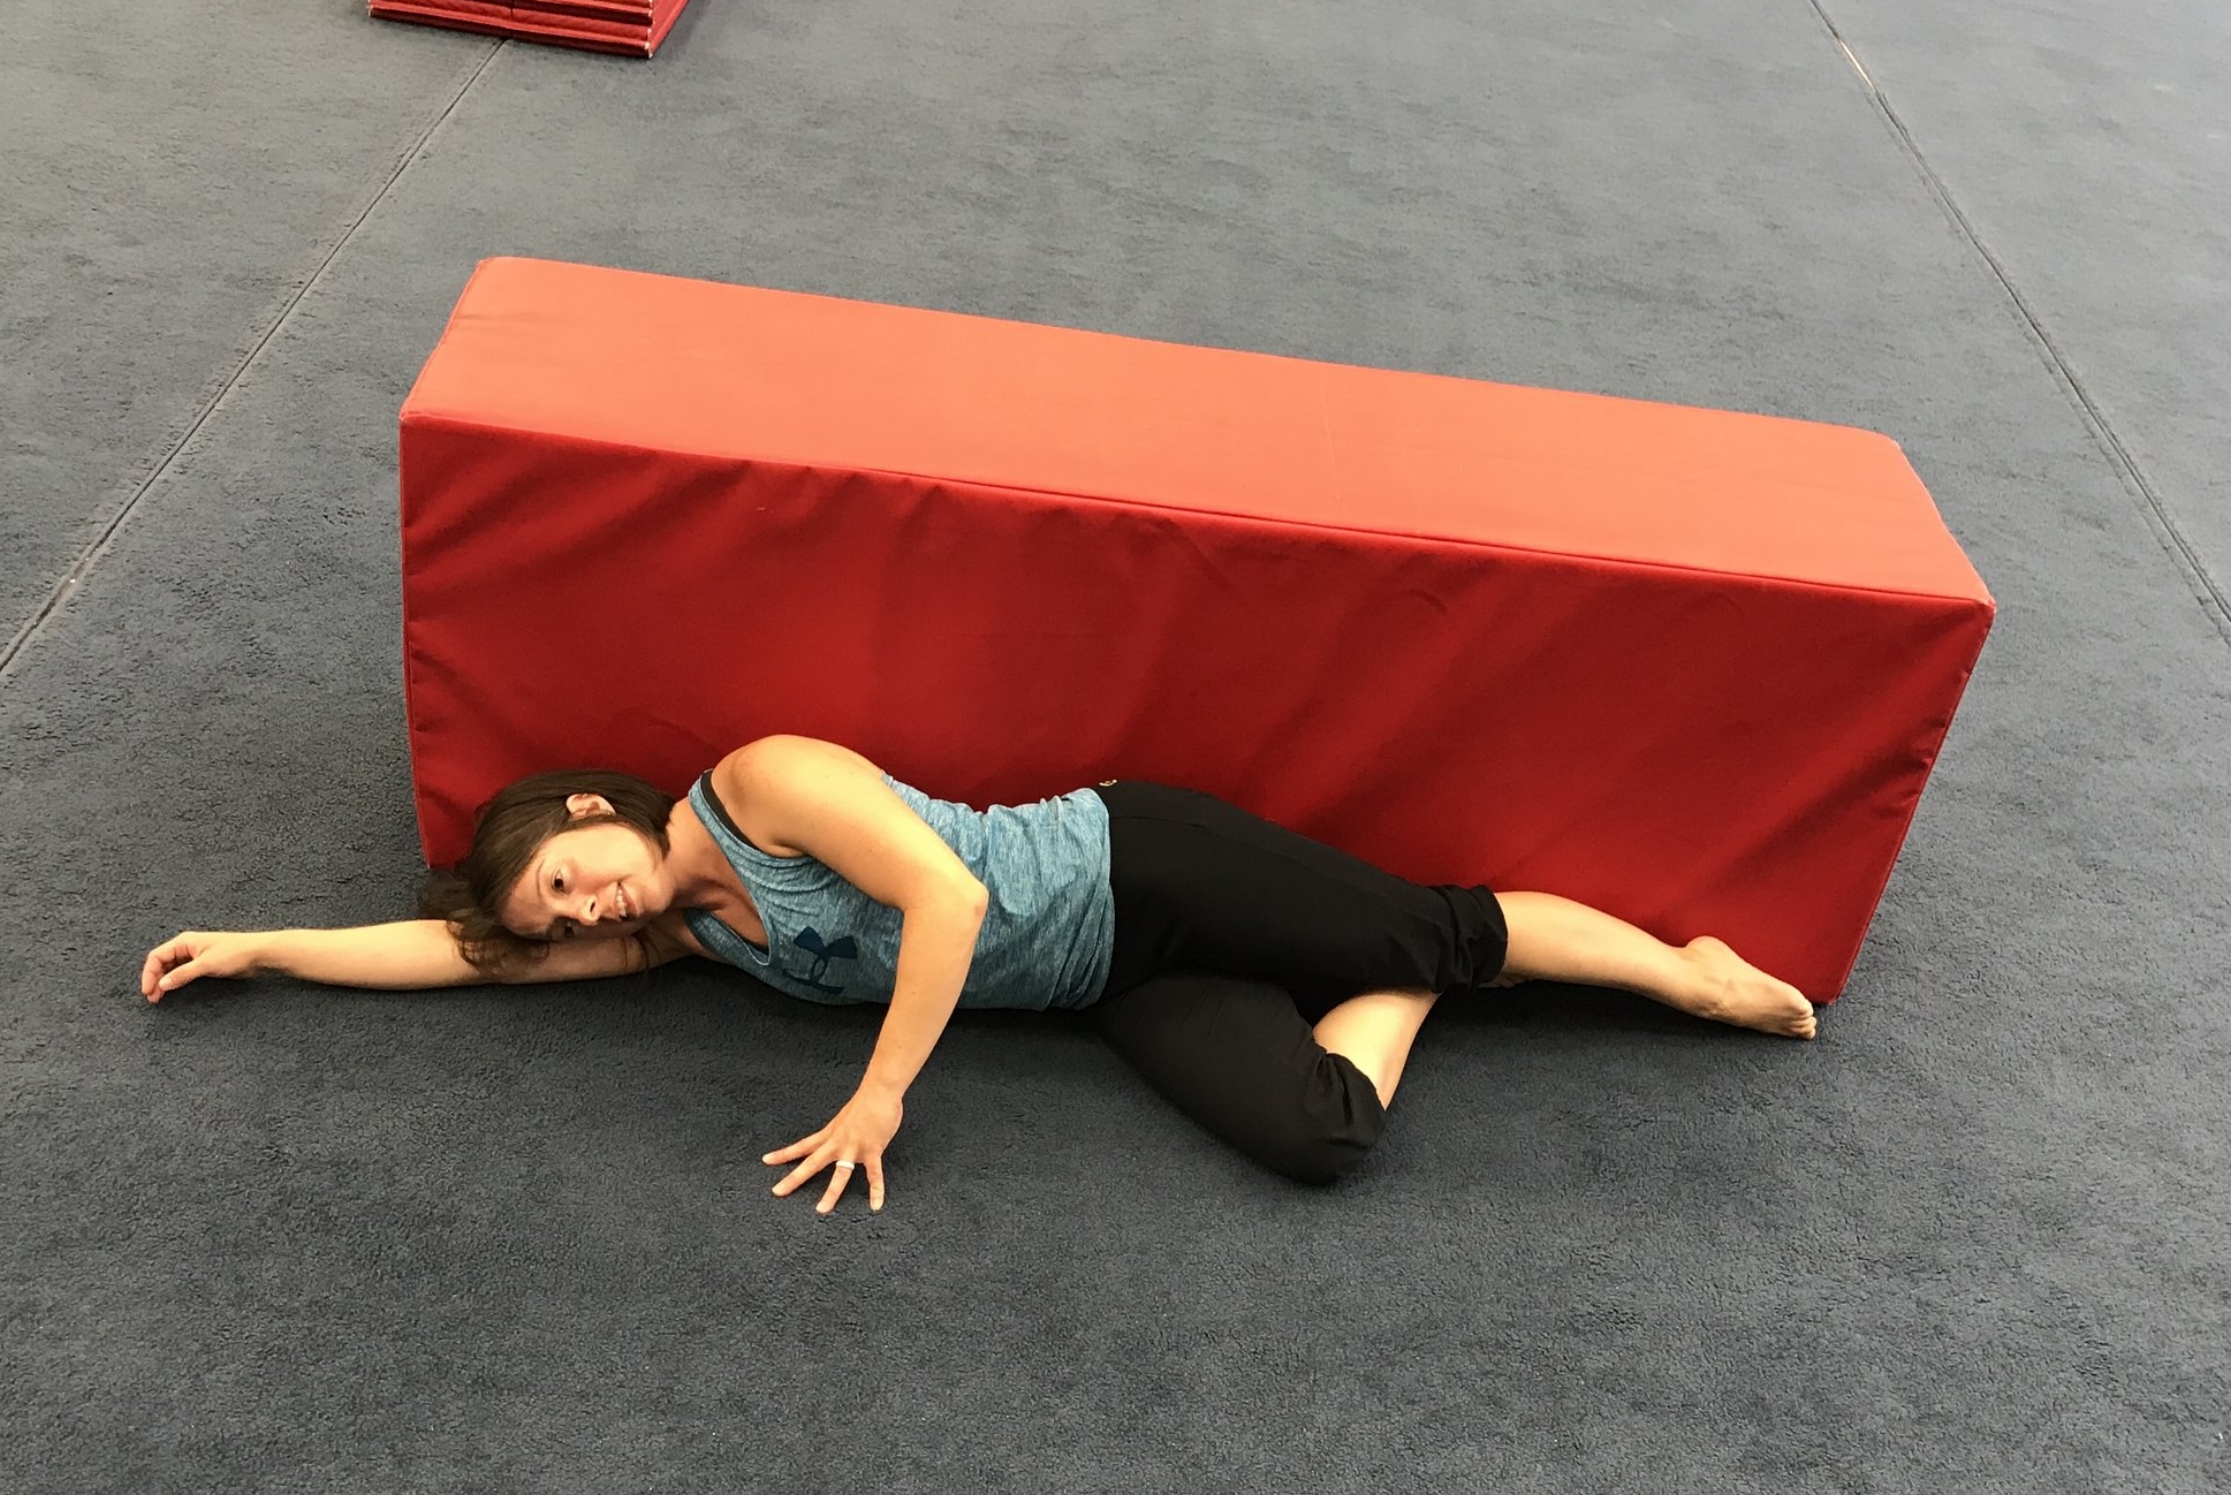
Side Lying Hip Abduction:
This exercise works the following muscles: gluteus medius, gluteus minimus, gluteus maximus, tensor fascia latae, and the core stabilizers (TA, obliques, multifidus).
Starting position: Lying on your side with a wall/mat behind you to cue for form. Bend the bottom leg and be certain to keep the hips perpendicular to the floor (or slightly tilted forward). Top leg is straight with the hip as extended as possible and the toe is slightly turned down.
Lift the top leg about 12-18 inches up while holding the core tight and the knee straight. Be sure that the leg does not come off the wall - there should be a straight line from your shoulders through your hips to your toes. Then return to the starting position.
Dosage: Do 20-30 repetitions per side; Do 3 times a week. Initially, do without weight. As the exercise becomes easier, add 1-2# ankle weights and increase the weight every 2-3 weeks.
Bridging:
This exercise works the following muscles: the lumbar paraspinals, the gluteals, the hamstrings and the pelvic floor/abdominals (if you are holding the core tight)
Option 1: Double leg bridge (Beginner - Intermediate)
Starting position: Laying with the knees bent and feet flat. Hands on the floor next to you for support/balance. Tighten the core (think abdominal brace/kegel).
While keeping the core tight and back flat, lift the hips off the ground until there is a straight line between the knees, hips and shoulders. Hold this position for 5-15 seconds (while breathing) and then return to the starting position.
Dosage: Hold for 5-15 seconds; Do 15-20 repetitions, 3 times a week.
Option 2: Single-leg bridge (Intermediate - Advanced)
If the prior exercise isn't a challenge for you, or becomes too easy after several weeks of consistent work, try this version. It works the same muscles, but as it is only one leg, the forces are higher and the required core activation is increased!
Starting position: Laying with the knees bent and feet flat. Hands on the floor next to you for support/balance. Extend one leg (straighten that knee). Tighten the core (think abdominal brace/kegel).
While holding the core tight, and the extended leg straight, lift the hips and leg off the ground until you have a straight line through the top leg, hip and shoulders. Hold for 5-10 seconds and return to the starting position.
Dosage: Hold for 5-10 seconds. Do 10-15 repetitions on EACH leg (yay - symmetry!), Do 3 times a week.
Quadriped Alternating upper extremity & lower extremity:
This exercise works the following muscles: Lumbar and Thoracic paraspinals, as well as the hip and shoulder stabilizers.
Starting position: In quadriped (on your hands and knees) with the core engaged and head neutral. Hold the abdominals braced (think belly button to back)
Raise one arm and the opposite leg slowly into the above position. Focus on holding the core tight and do not let the hips twist/rock. Return to the starting position and then raise the opposite arm/leg.
Dosage: Do 15-20 repetitions per side - moving slowly throughout. Do 3 times a week.
Plank:
While this exercise doesn't target a muscle on the back of the body, it is perhaps my favorite exercise to incorporate into a posture/general wellness routine. Plank is an isometric (meaning that the muscles contract but don't change length) core exercise and can improve everything from back pain to inversion strength on the fabrics.
This exercise works the following muscles: transverse abdominus (primary target), the abdominal obliques and the rectus abdominus. The position also requires the scapular stabilizers, the hip flexors and the quadriceps/gluteals to be engaged (among others).
With the back flat and tummy pulled in (think belly button to back), prop yourself on your elbows. Hold the head neutral and the legs tight. BREATHE during this and be sure that you are not rounding the back!
Dosage: Begin with a 30 second hold, for 3 repetitions. Do 3 times a week.
If that's too hard, try the knee plank variation below. If that's too easy, add 15 seconds PER week until you reach 2-3 minutes.
Once you can hold for 2-3 minutes, it it likely time to progress to the hollow body hold (a.k.a. extended plank) also shown below. Just remember - FORM IS KEY! Don't progress so quickly that you're cheating yourself out of good technique!
The knee plank: a modification of the plank position. This is ideal for someone just starting out, or for someone recovering from an acute bout of back pain/shoulder injury. Dosage is the same as the plank hold above.
Hollow body hold: aka. The extended plank. This is ideal for those that find the plank hold easy and are looking to increase their core strength for inversions, tumbling or other acrobatic pursuits. Be sure to keep the back flat (no sway-back/arching) and the head neutral. Dosage is the same as the above plank, but be sure to start at a lower hold time when progressing to this variation from the regular plank!
Questions? Concerns? Drop me an email at aprescott@acropt.com or leave it in the comments!


